Setting up a publically hosted web app that integrates the AIQUA Web SDK can be time consuming, specially when we need to quickly prototype and test new ideas.
This codelab will show you how to bootstrap and run a local web testing environment that integrates with the AIQUA Web SDK straight from our development machine.
Prerequisites
- Docker with Docker Compose
- An AIQUA account (staging environment)
Get the code
Get the web sdk bootstrap code from bitbucket:
$ git clone git@bitbucket.org:plaxieappier/aiqua_web_test_env_bootstrap.git
Alternatively, you can download the code from this link
Bootstrap
Go inside the directory and execute:
$ cd aiqua_web_test_env_bootstrap/
$ docker-compose up -d
You can check the temporary web app url tunnel generated by cloudfared by looking into the docker logs:
$ docker-compose logs cloudfared
You should see something like this:
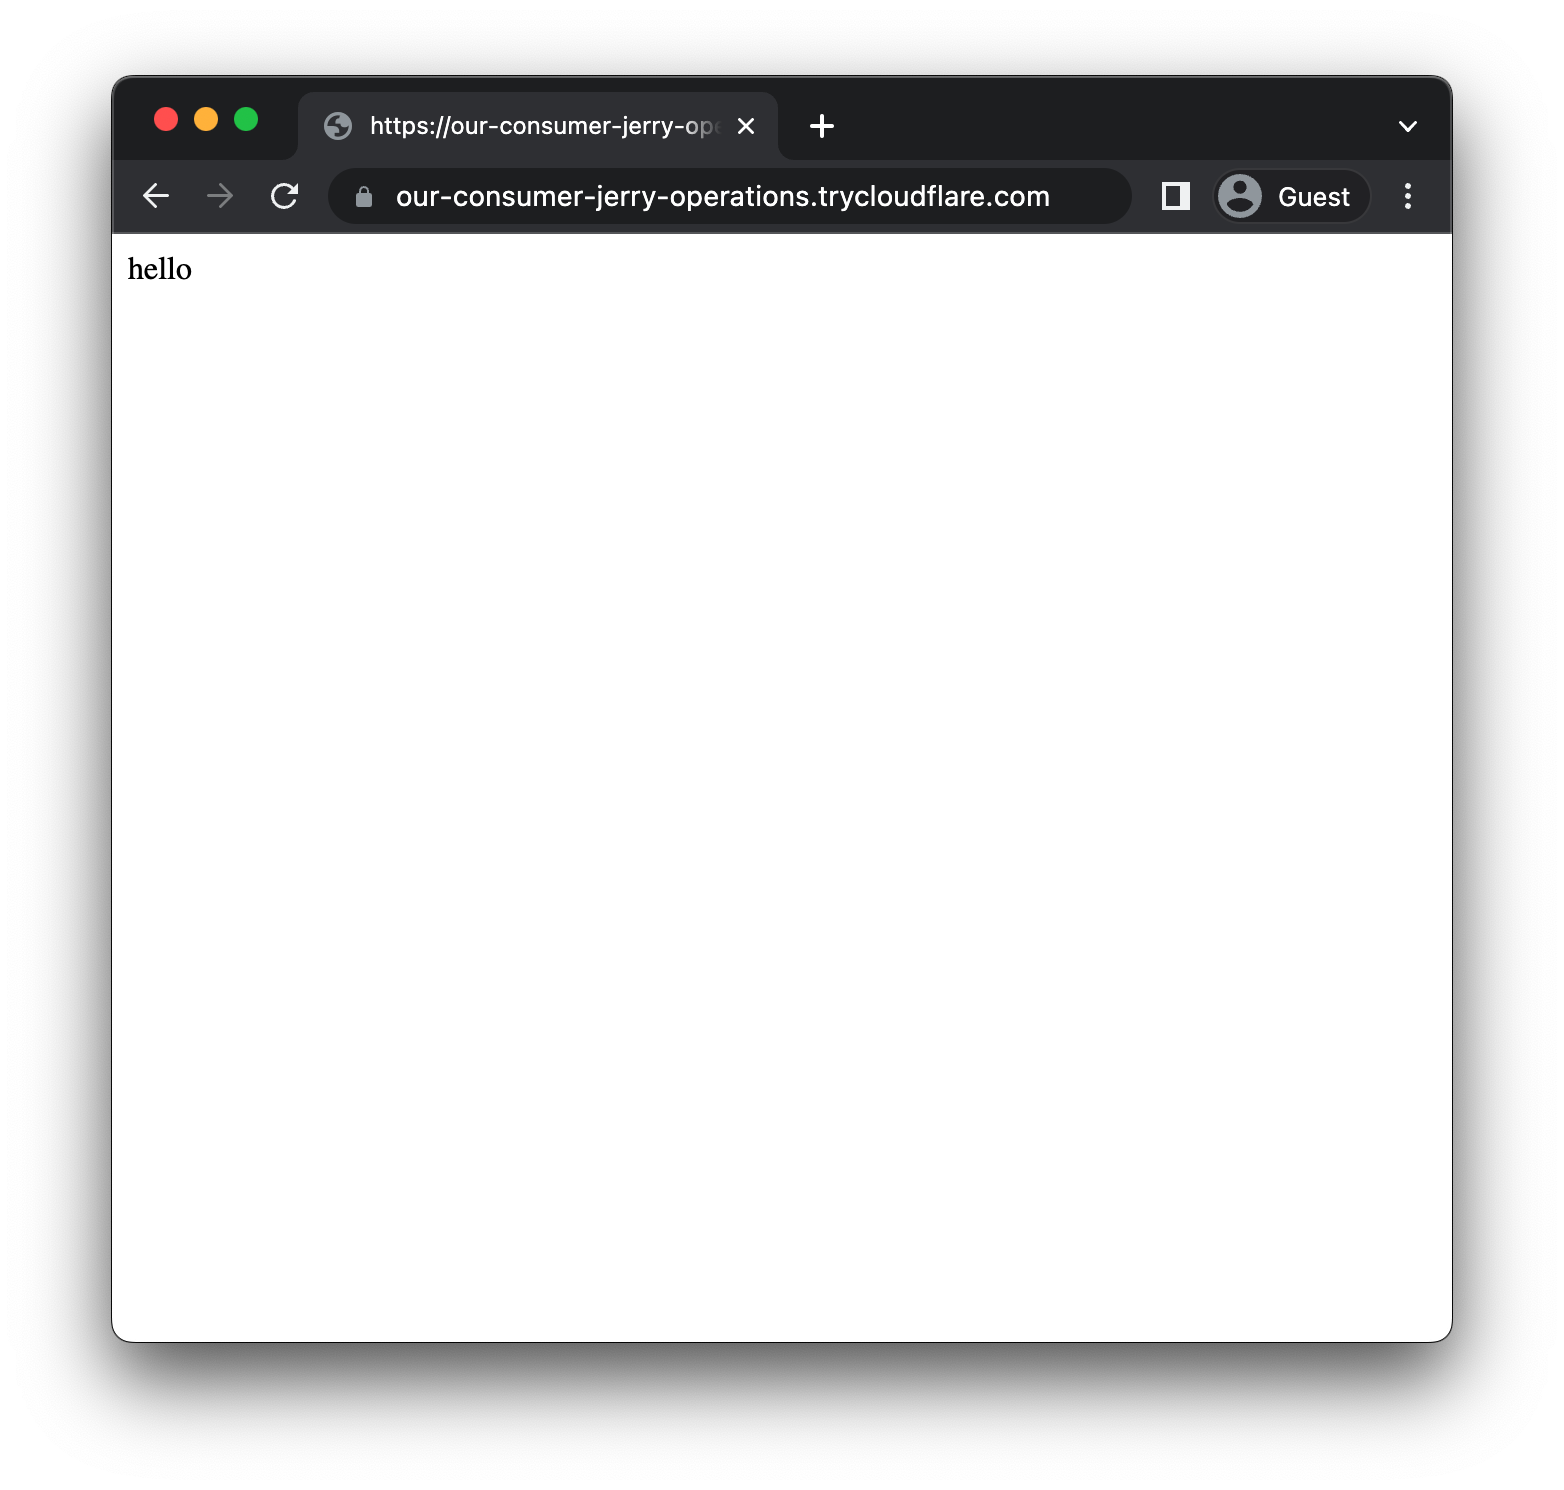
...
aiqua_web_test_env_bootstrap-cloudfared-1  | 2022-07-27T11:31:38Z INF +--------------------------------------------------------------------------------------------+
aiqua_web_test_env_bootstrap-cloudfared-1  | 2022-07-27T11:31:38Z INF |  Your quick Tunnel has been created! Visit it at (it may take some time to be reachable):  |
aiqua_web_test_env_bootstrap-cloudfared-1  | 2022-07-27T11:31:38Z INF |  https://our-consumer-jerry-operations.trycloudflare.com                                   |
aiqua_web_test_env_bootstrap-cloudfared-1  | 2022-07-27T11:31:38Z INF +--------------------------------------------------------------------------------------------+
...
Open up the url to verify your web app is up and running
Watch mode
Watch mode is enabled by default. Head to app/src/public/index.html file and modify the contents of the HTML's body in line 19 and then reload the site to see your changes reflected
     </script>
   </head>
   <body>
-    hello
+    hola
   </body>
 </html>

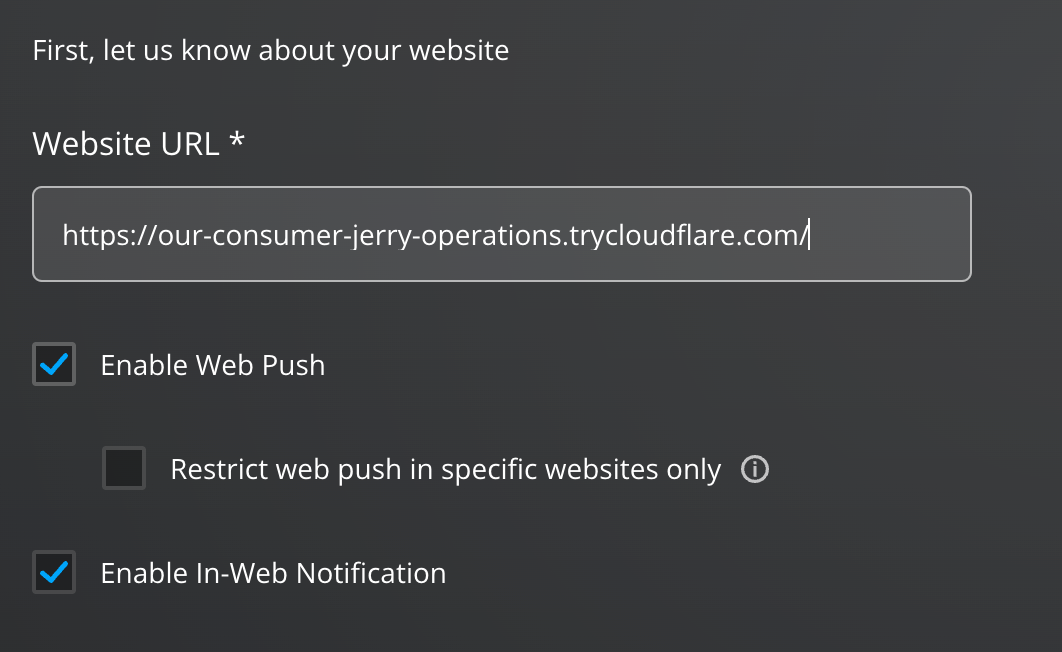
Open your AIQUA Dashboard and select Integration > Website to setup your website by pasting the url generated by cloudfared, and then click Next
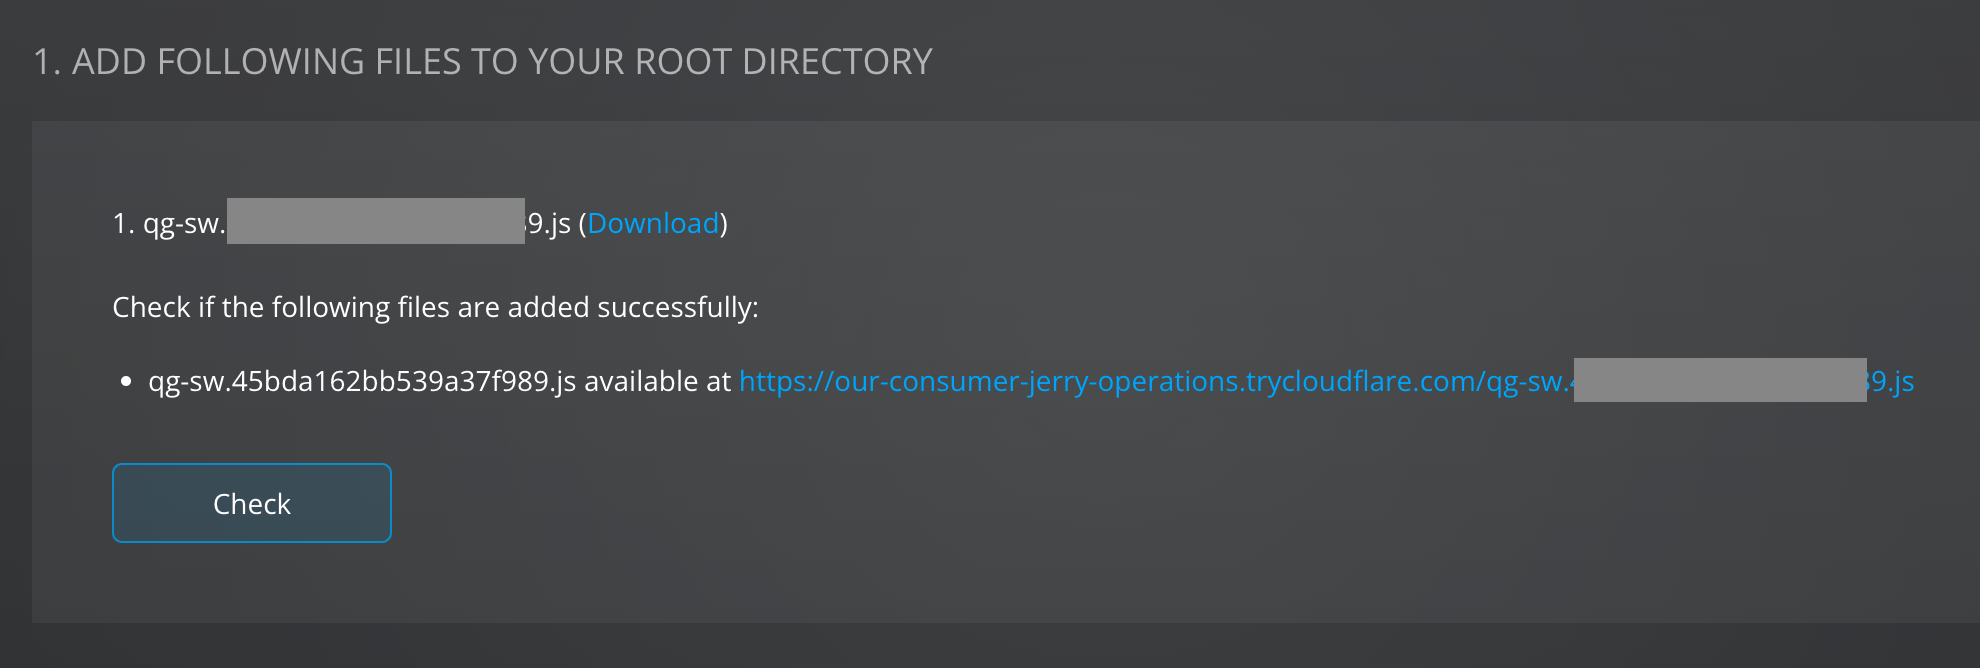
Add the required files to your root directory
Click the Download button next to qg-sw.YOUR_APP_ID.js and add this downloaded file to the root directory of your web app located in app/src/public/
app/src/public/
.
├── index.html
└── qg-sw.YOUR_APP_ID.js
Since watch mode is enabled by default, you can click Check to verify your qg-sw.YOUR_APP_ID.js file was added successfully.
Add your app id to the general SDK
Open app/src/public/index.html and add your app id in line 5:
<html>
   <head>
     <script type="text/javascript">
-      const appIdentifier = "";
+      const appIdentifier = "YOUR_APP_ID";
Refresh your website. You should see a prompt requesting for push permission. Click "Allow".

Congratulations, you've successfully completed this codelab!
Now that you have a testing environment setup, you may head up to the AIQUA Documentation to learn and experiment with the different functionalities, including Launching Campaigns and Audience Segmentation.
You may also check out the other codelabs for more hands-on tutorials