In this codelabs, you will learn a basic yet powerful feature of AIQUA: how to send a web push notification.
Imagine you are a marketer for an online travel agency launching a new product called Tokyo tour. Your mission is to get more users to book this product.
Prerequisites
- Make sure you have integrated AIQUA's Web SDK into your web app.
What you'll learn
- How to check for the most recent users of the Web SDK platform
- How to segment your audience into subgroups
- How to create regular campaigns
- How to trigger campaigns based on certain user events
- How to check the user events on AIQUA's dashboard
Goals
- Create a segment to target yourself
- Create a regular campaign using the segment in (1). The creative should include an image and link to https://tw.demo-aiqua.appier.ai/demo/travel/index.html
Expected result
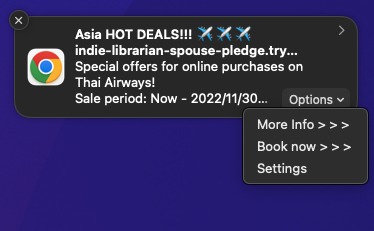
- Receive a web push notification
- The notification should include an icon of your choosing and some emojis
- It should include a couple of action buttons
- When clicked, it should bring you to https://tw.demo-aiqua.appier.ai/demo/travel/index.html
- AIQUA's dashboard should display the user's activity after the notification is clicked
- The events
notification_sent,notification_received, andnotification_clickedshould be recorded
- The events

Give it a try!
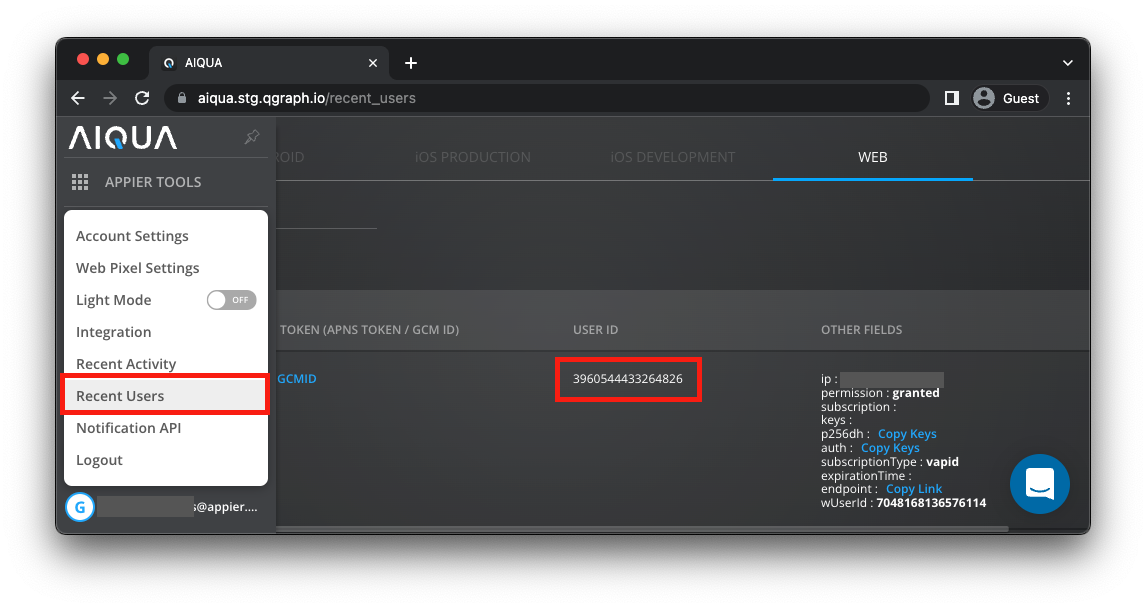
- Head over to recent users under your account name in the lower-left corner
- You may want to hit the refresh button in your website to make sure the user is registered
- Check the last recorded user and copy its user id
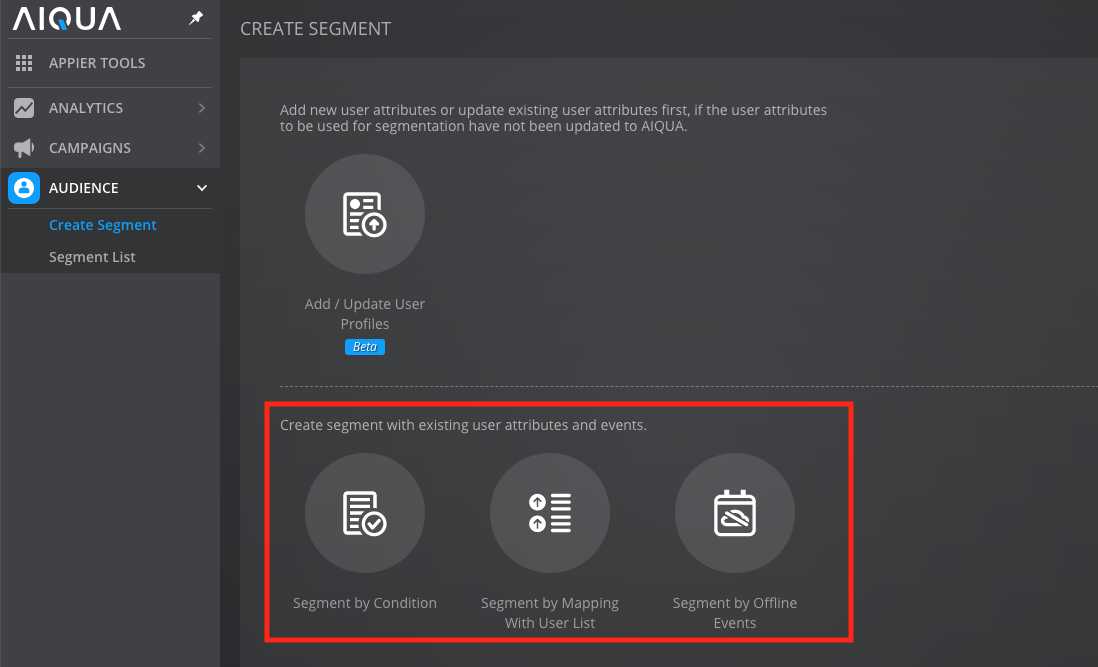
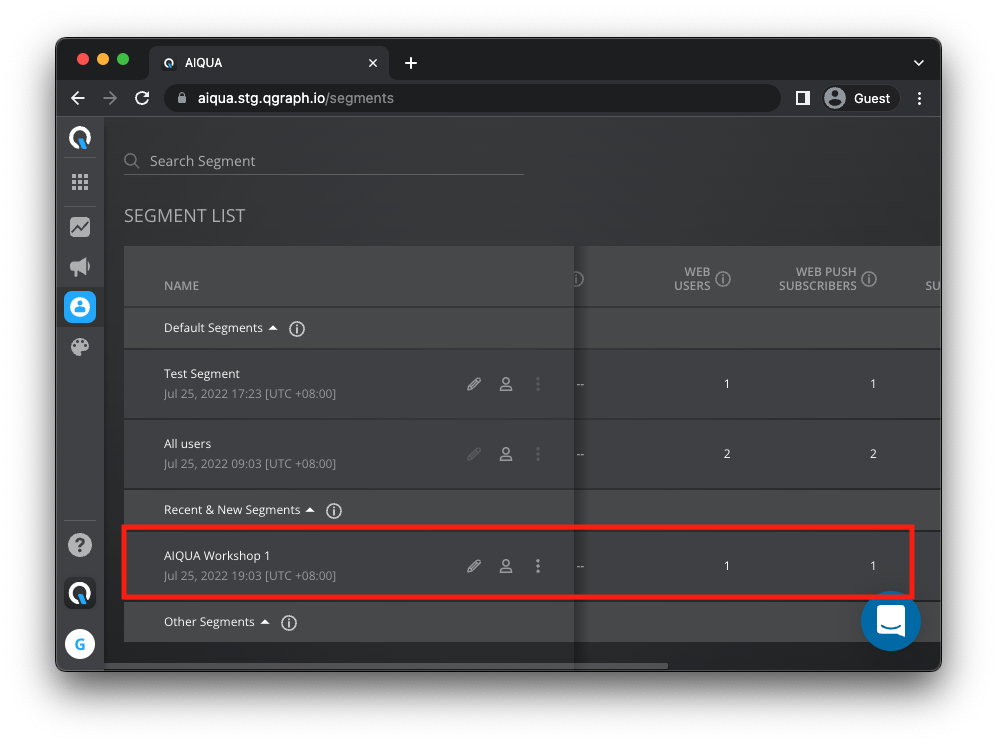
- Go to Audiences > Create Segment > Segment by condition and type a name for the segment. We named our segment "AIQUA Workshop 1" in this case.
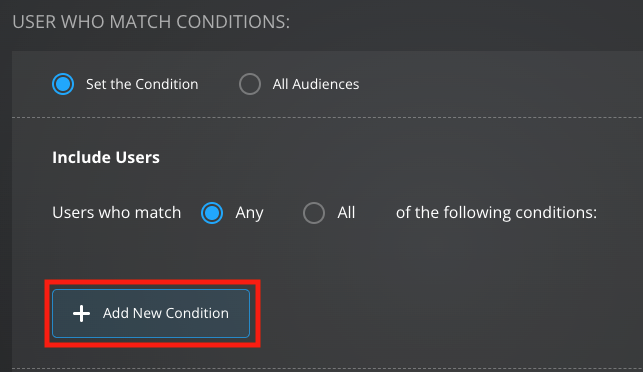
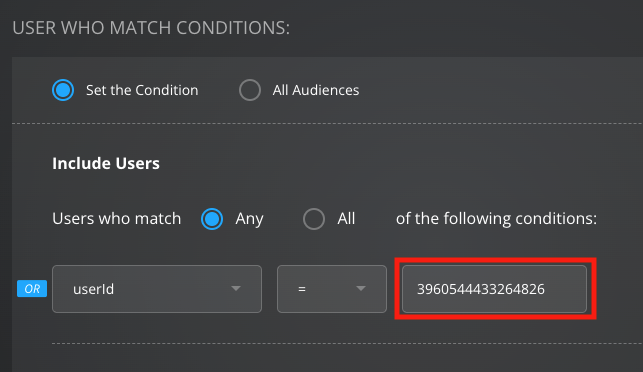
- Add a condition for all users who match the userId of the previous step
- Make sure that under segment list you have exactly 1 web user and 1 web push subscriber
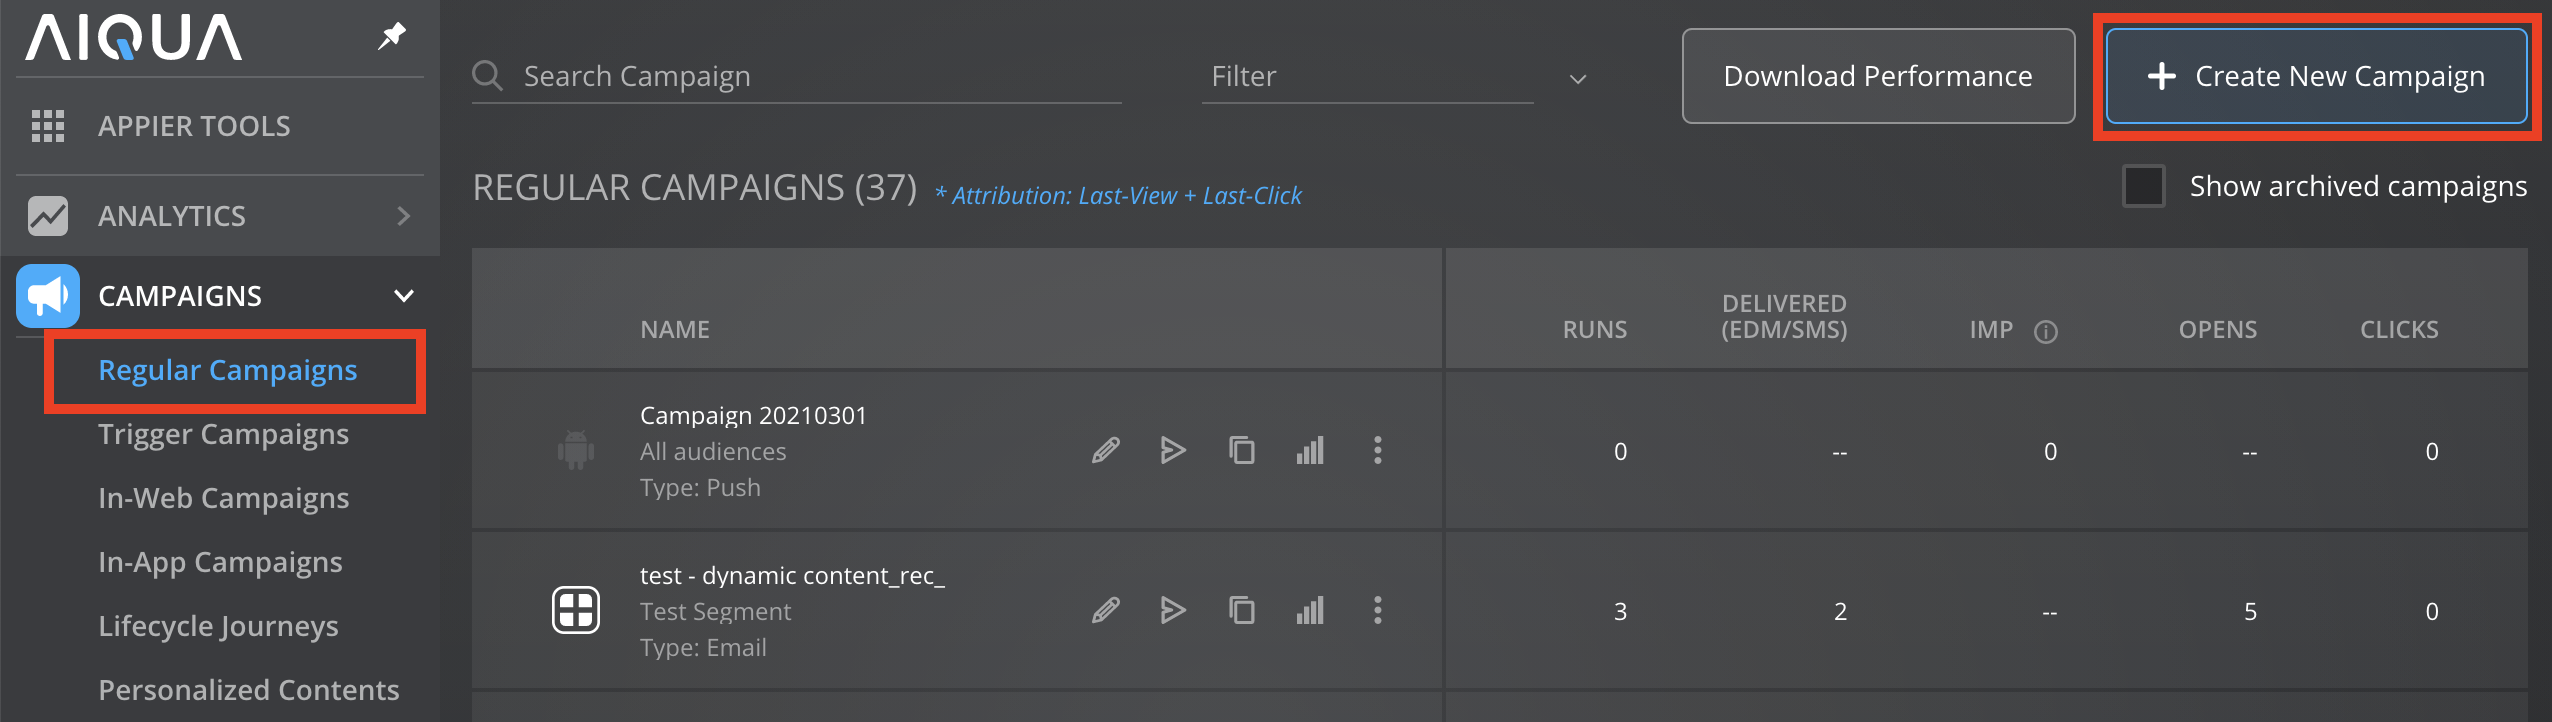
- Go to regular campaigns and then click the Create New Campaign Button
- In the CAMPAIGN box, type in the name of your campaign and select Push as the Campaign Type
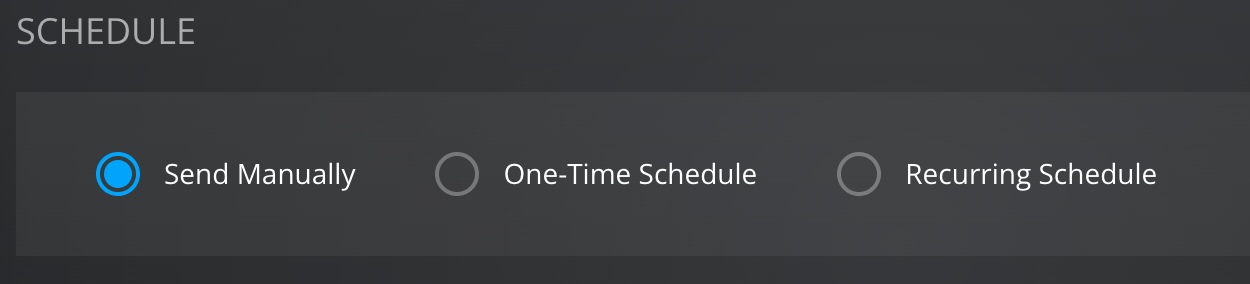
- For the campaign schedule, select Send Manually
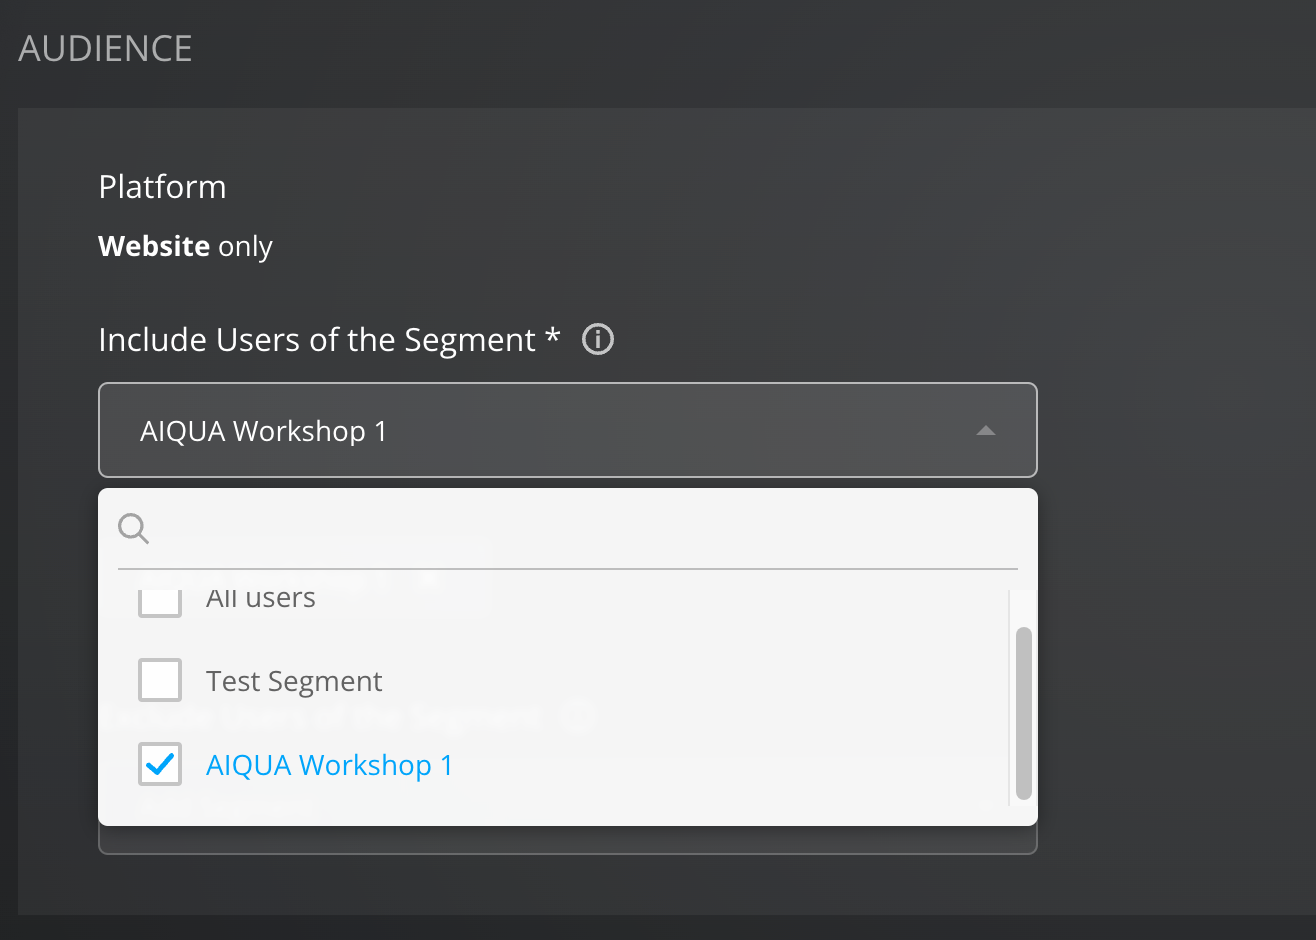
- When selecting your audience, choose Include Users of the Segment and in the drop-down list select the segment you created in the previous step
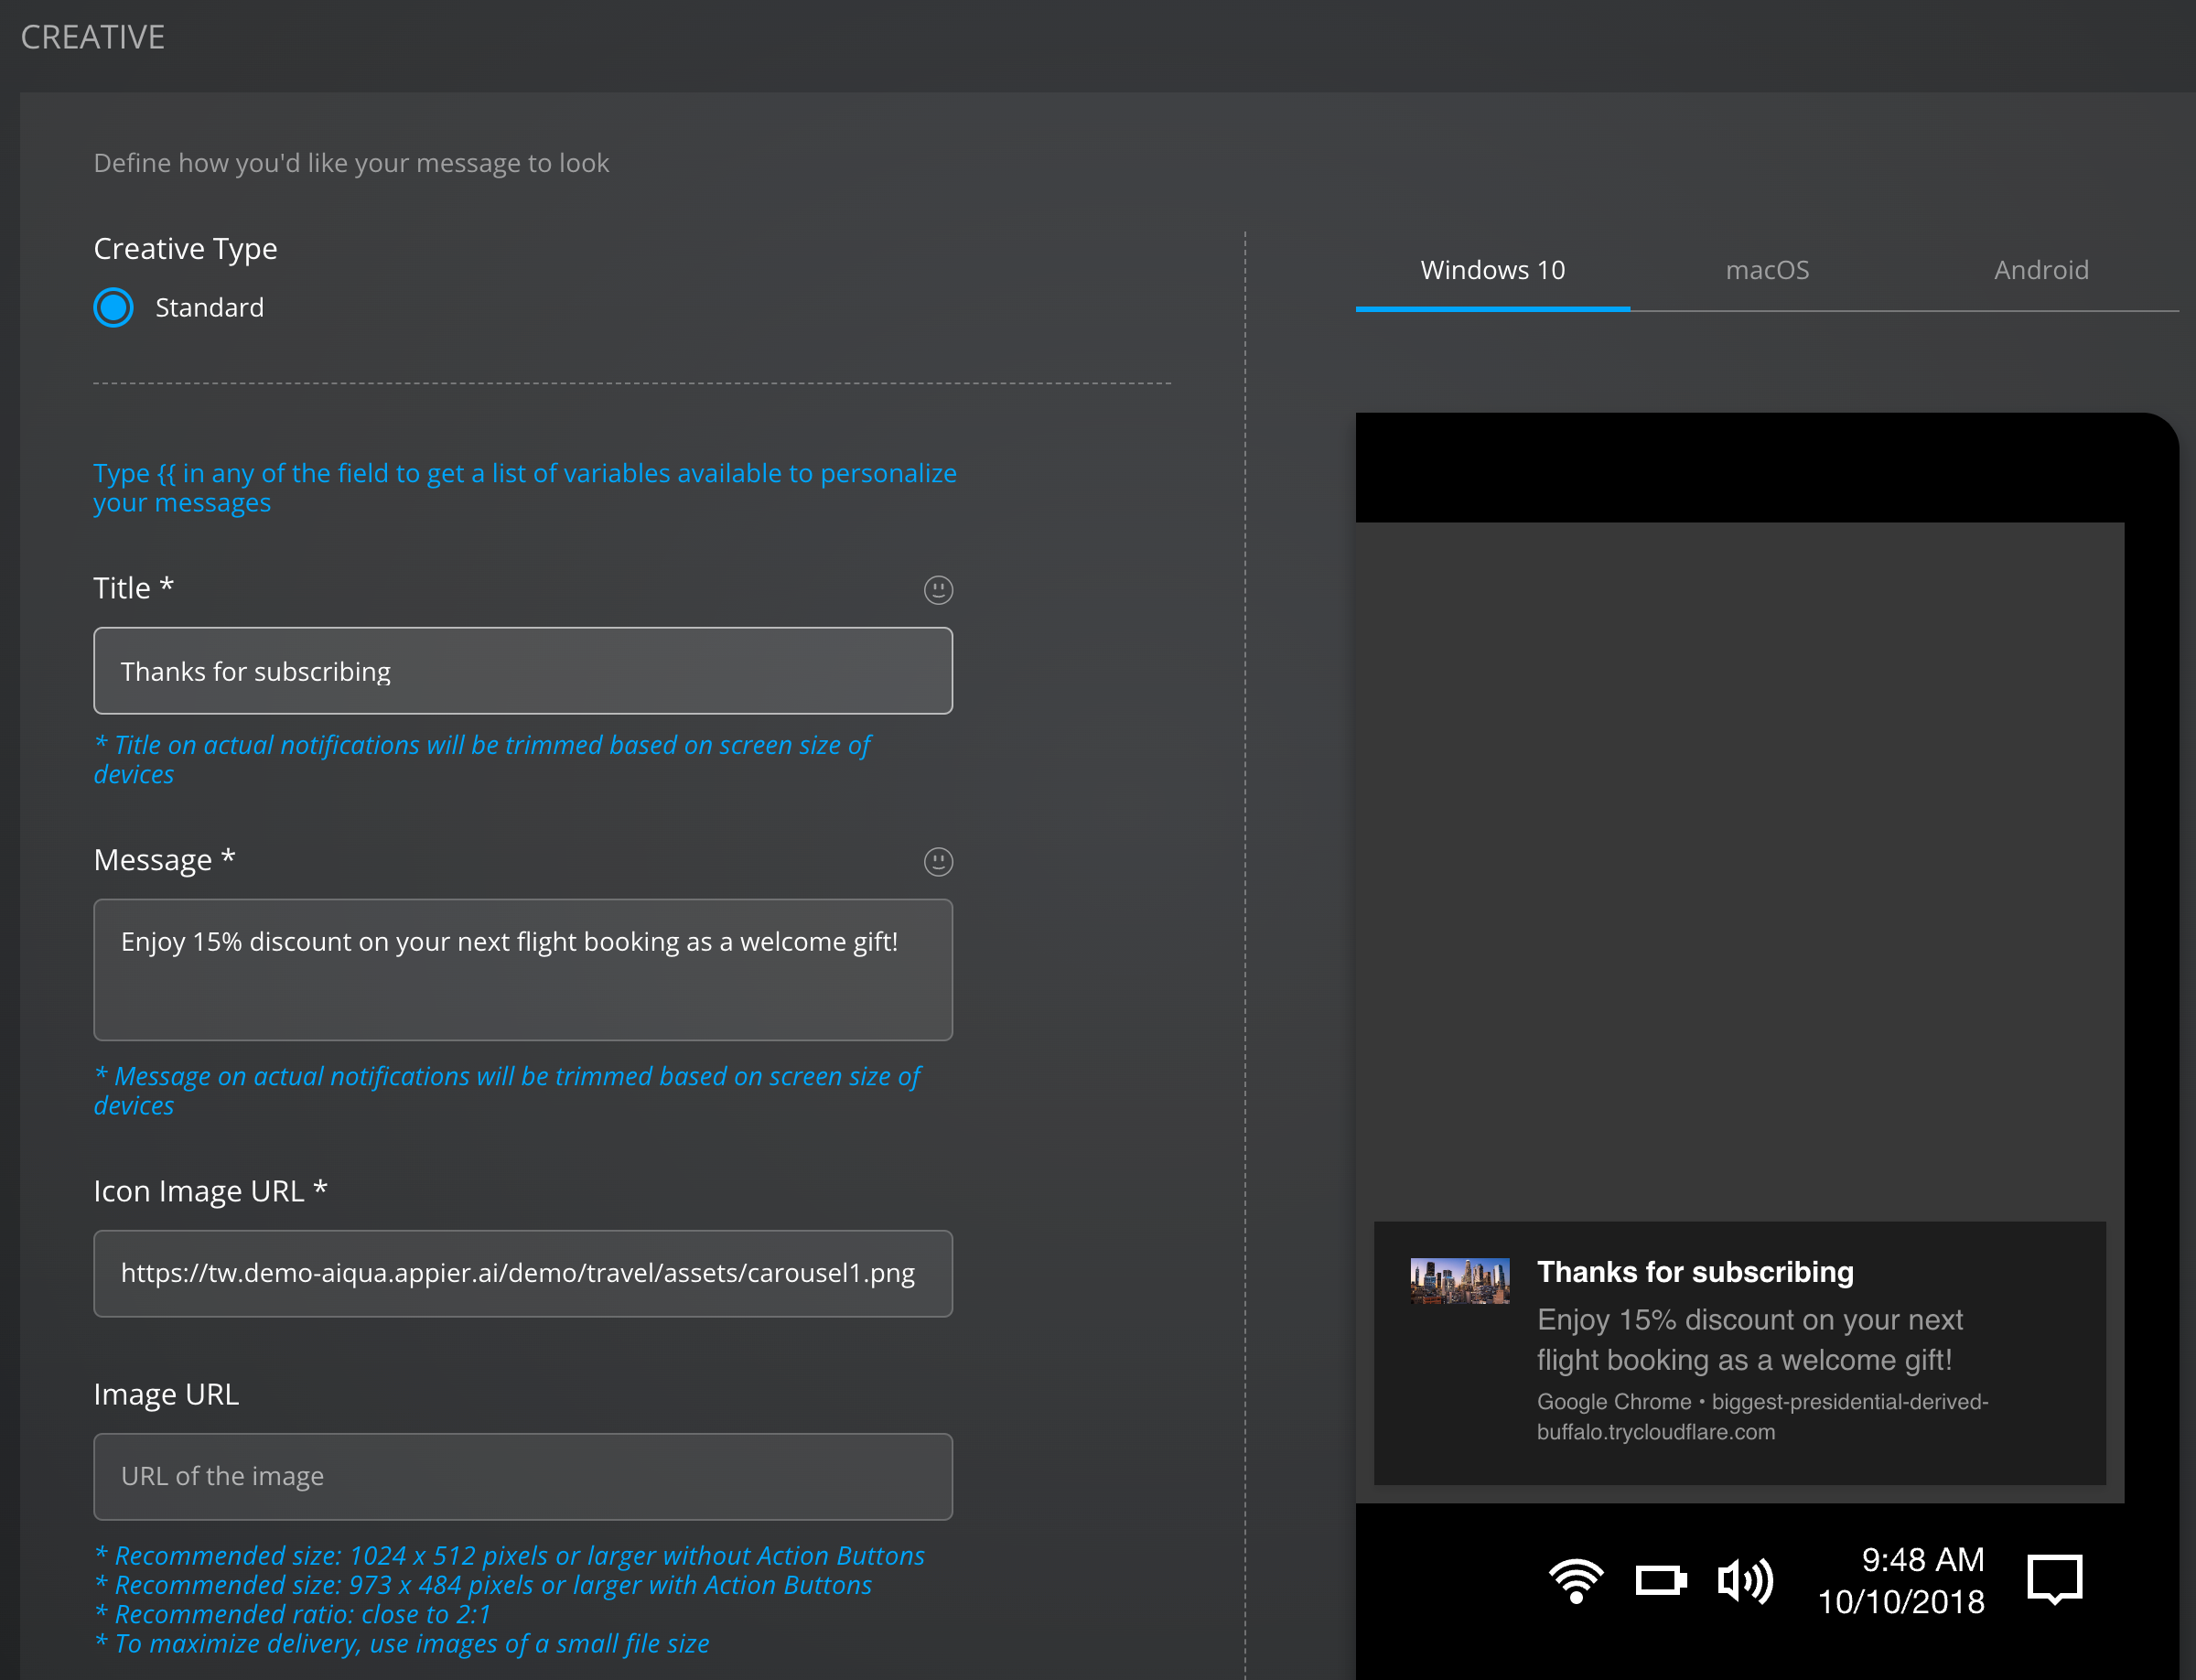
- In the CREATIVE sections, select Standard Creative type and fill in your Title, Message, and Icon
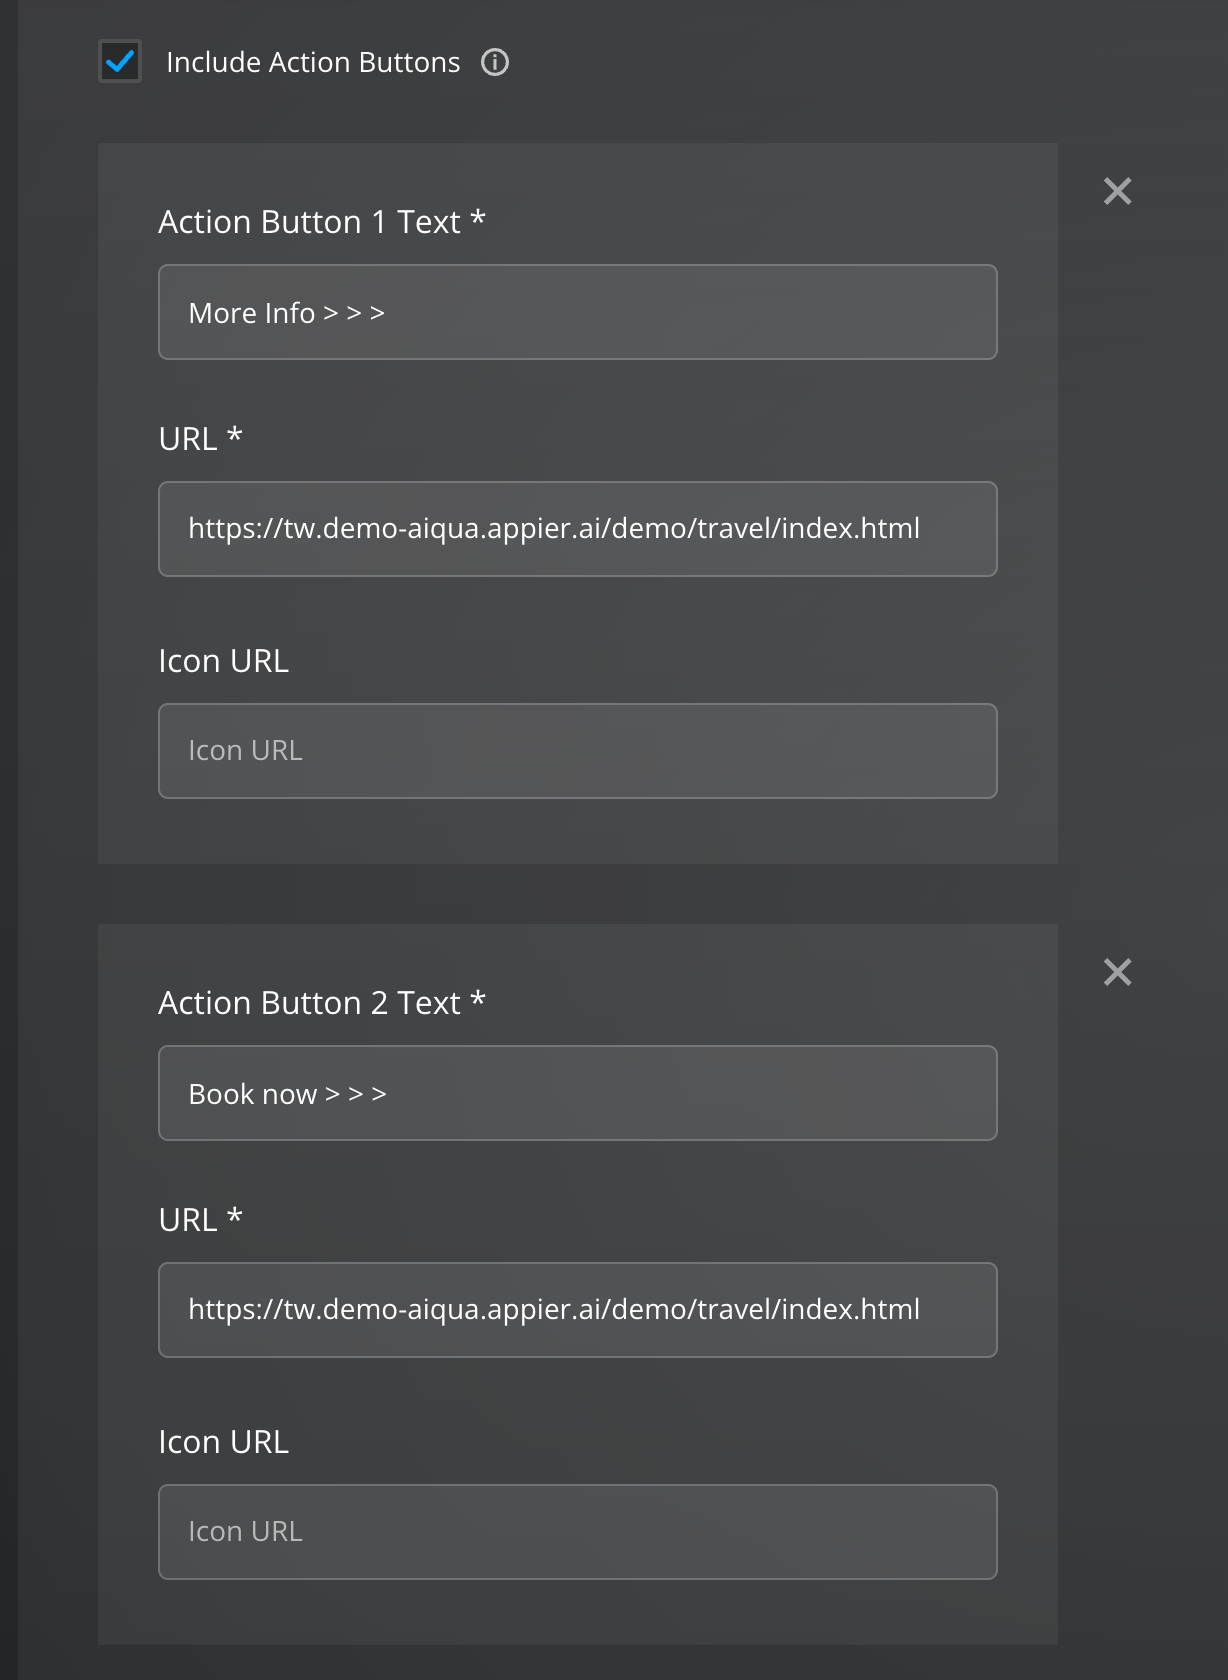
- Include a couple of Action Buttons. Remember that each button should take us to https://tw.demo-aiqua.appier.ai/demo/travel/index.html
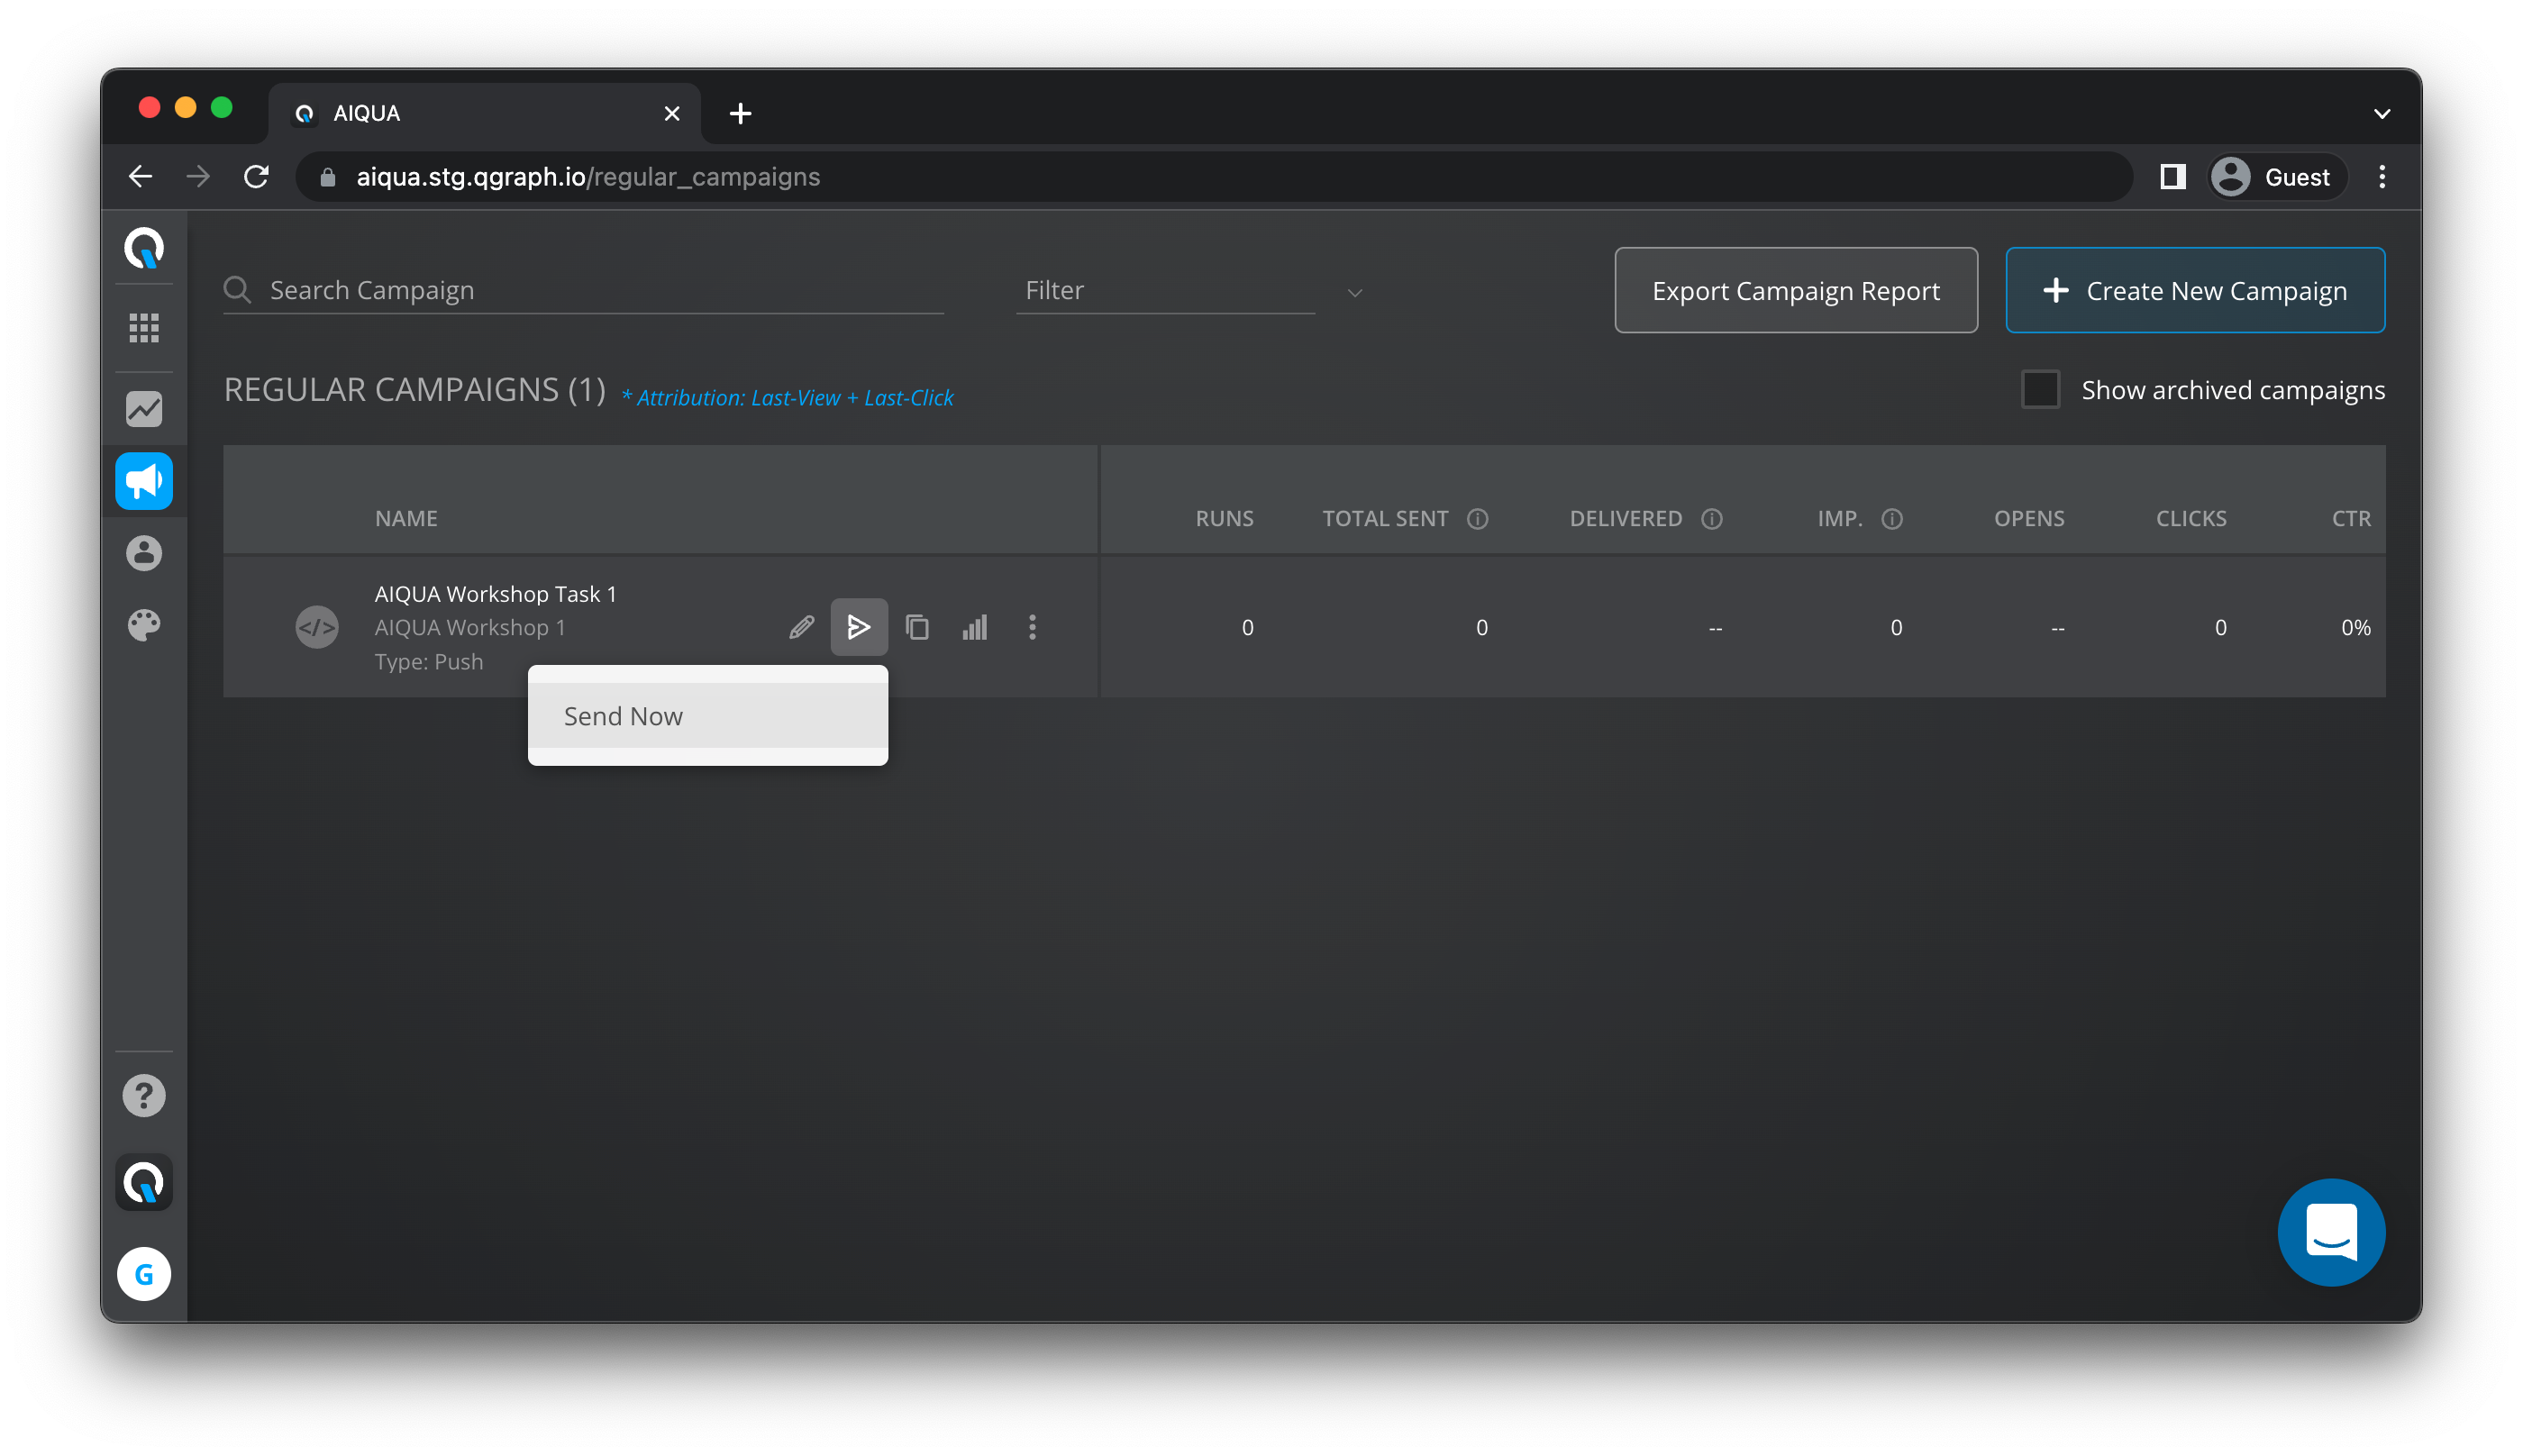
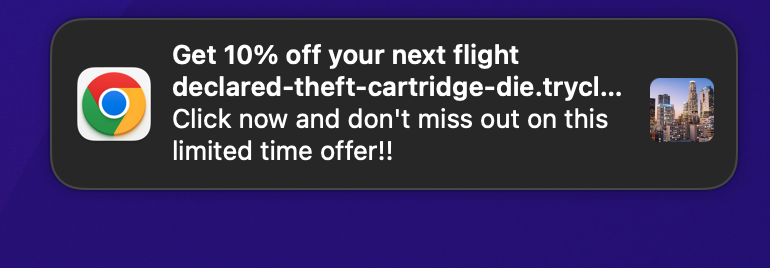
- Click Save to save all your settings and exit. In the campaign list you will see the recently created campaign. Click on the Send Now and you will receive your push notification!
- Click on the notification after receiving it, you will be redirected to https://tw.demo-aiqua.appier.ai/demo/travel/index.html
- Head over to Recent Activity and under the web tab you will now see the
notification_sent,notification_received, andnotification_clickedevents, all by the same user ID from our example.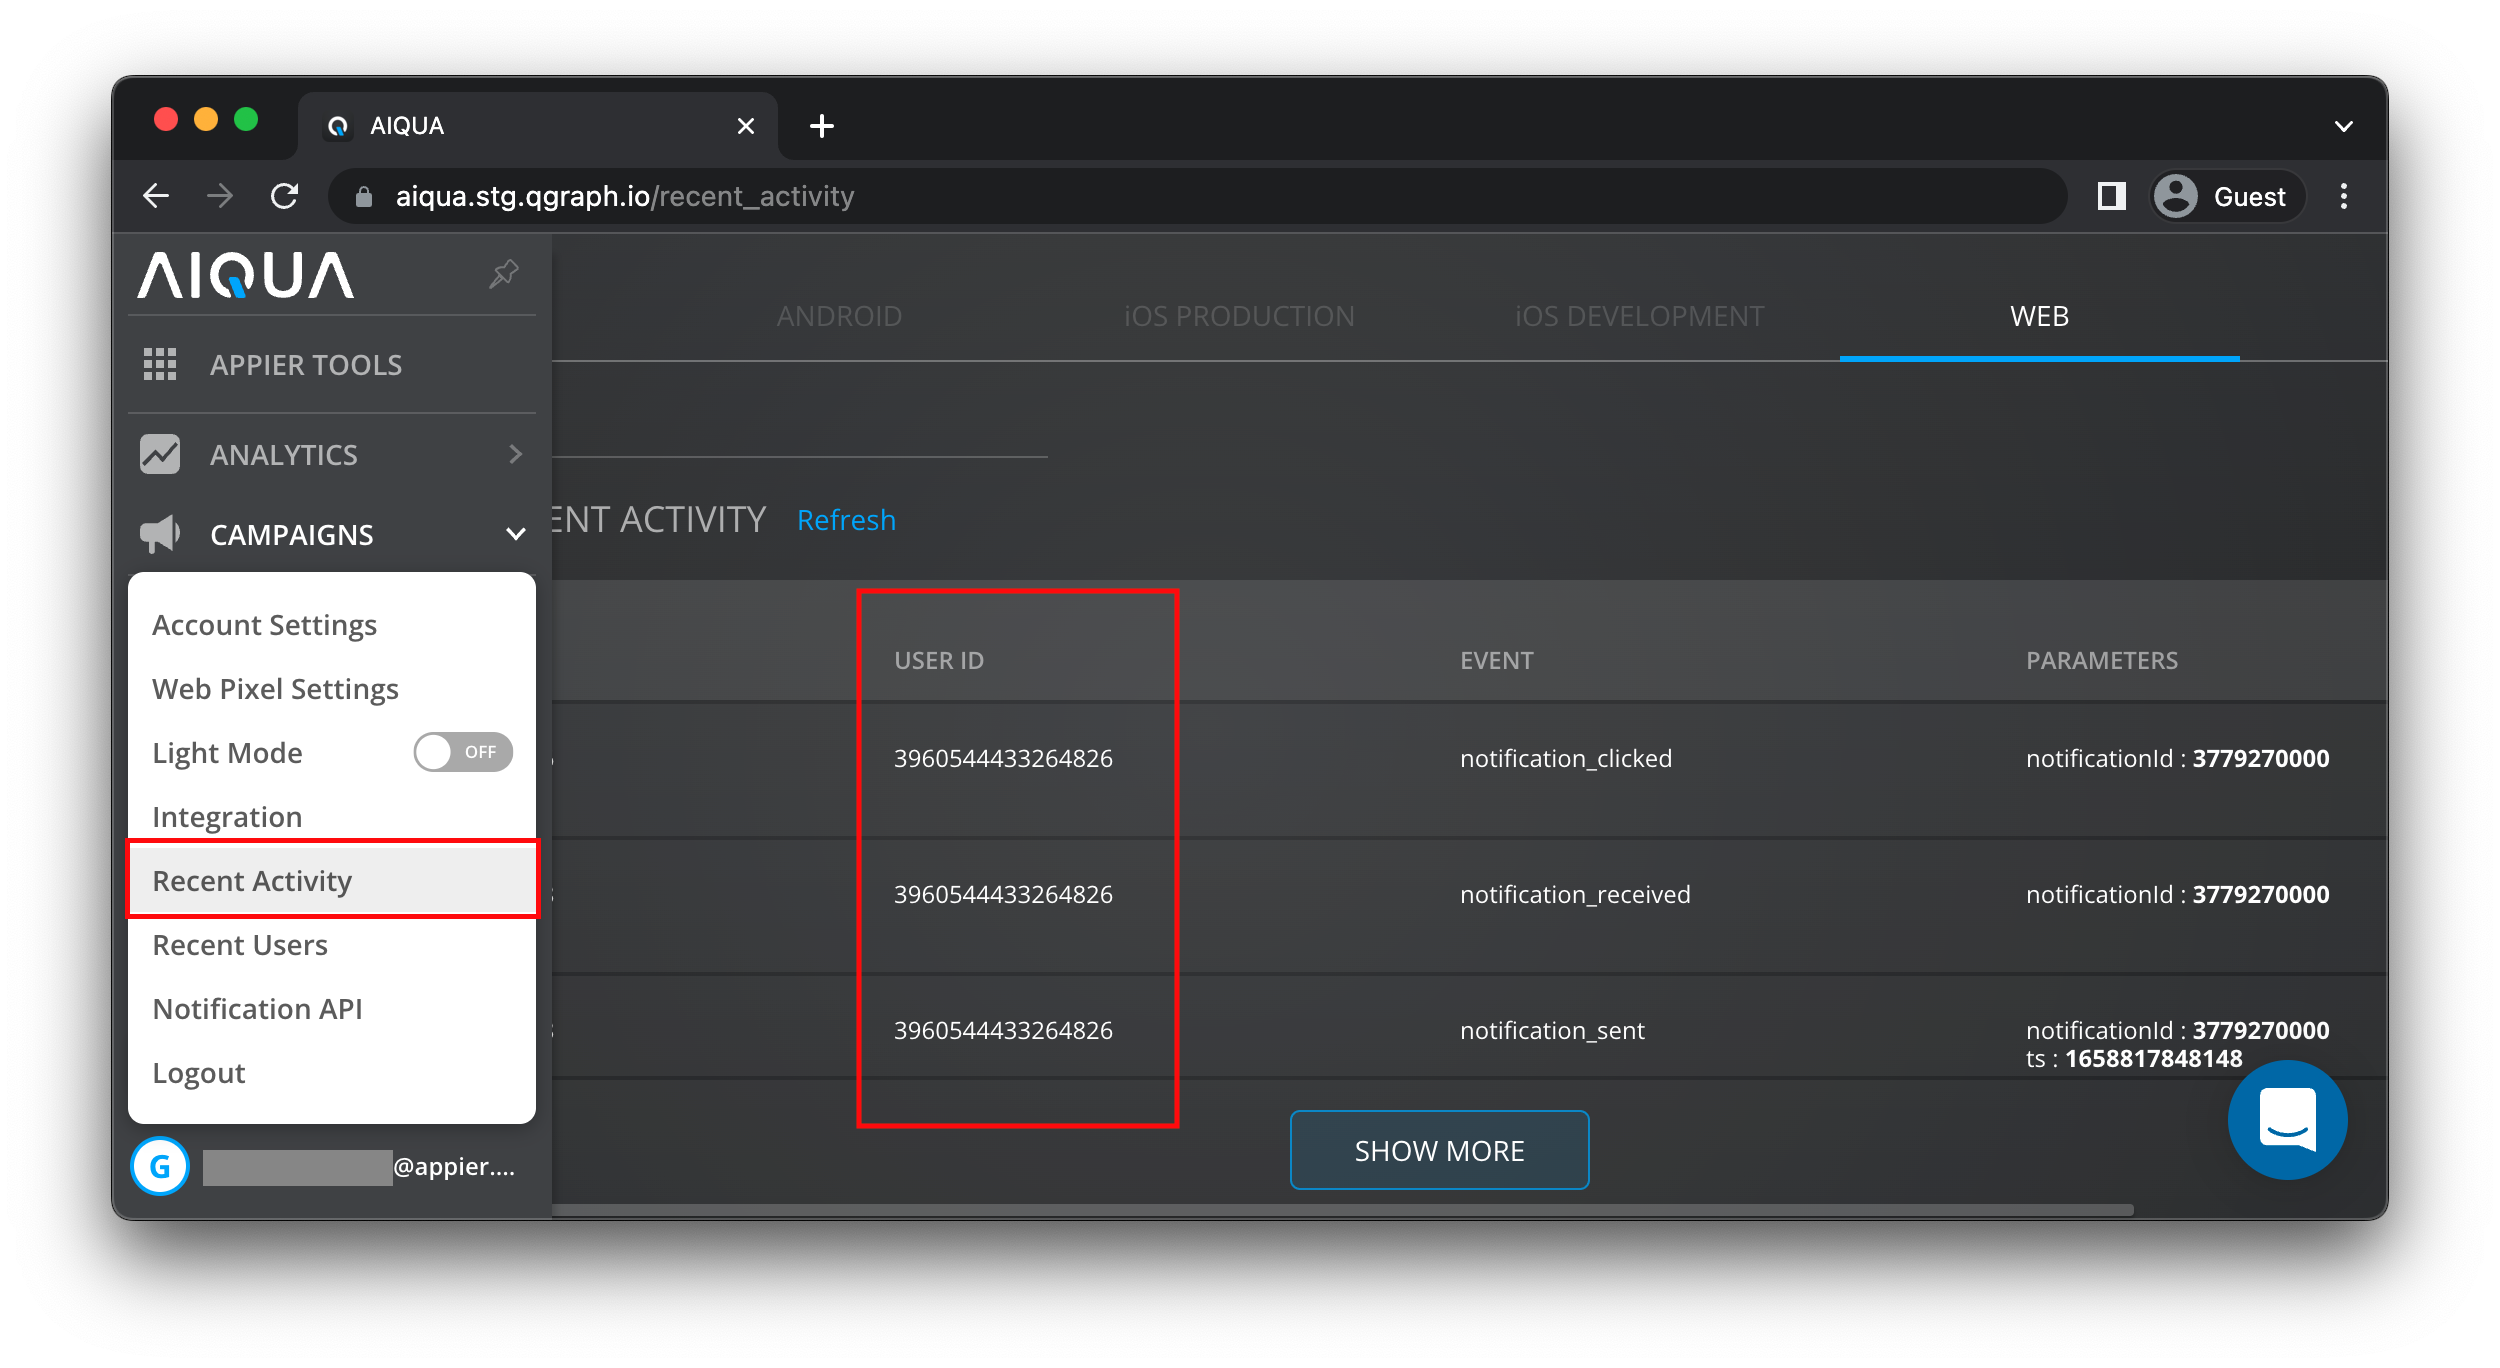
Congratulations! You have completed Task 1 and received your first Web Push Notification! Now head to the next task to where you will learn about trigger campaigns
In the previous task we learned how to send a basic web push notification informing our users of some deals we want them to check out. Subscribed users will receive the notification and see it, however it doesn't guarantee they will click on it.
How should we motivate the users who didn't click on our first notification to not miss out on our offers and deals? Moreover, how do we sent this notifications without having to manually check which users should be reminded?
Goals
- Being able to deliver notifications based on certain user actions
- Being able to setup rules to deliver notifications automatically
Expected result
- Receive a web push notification (Same as task 1)
- Deliver a second notification only if the first notification arrives but doesn't get clicked
- Schedule it to arrive 5 minutes after the user received but didn't click the first one
Give it a try!
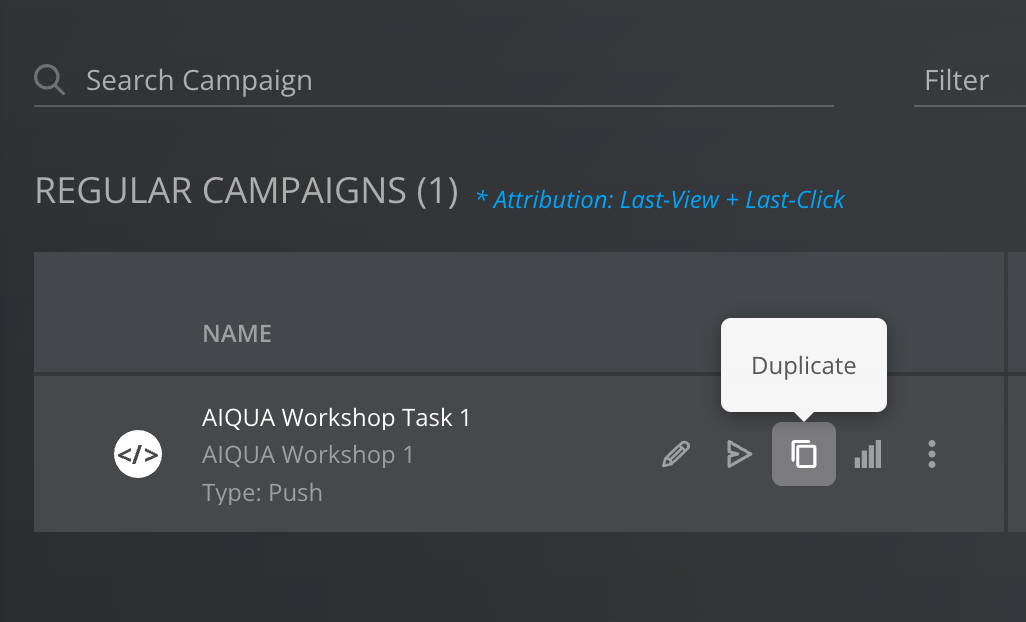
- Begin by creating a copy of the regular campaign from Task 1 and renaming it. We rename it to "AIQUA Workshop Task 2" in this example
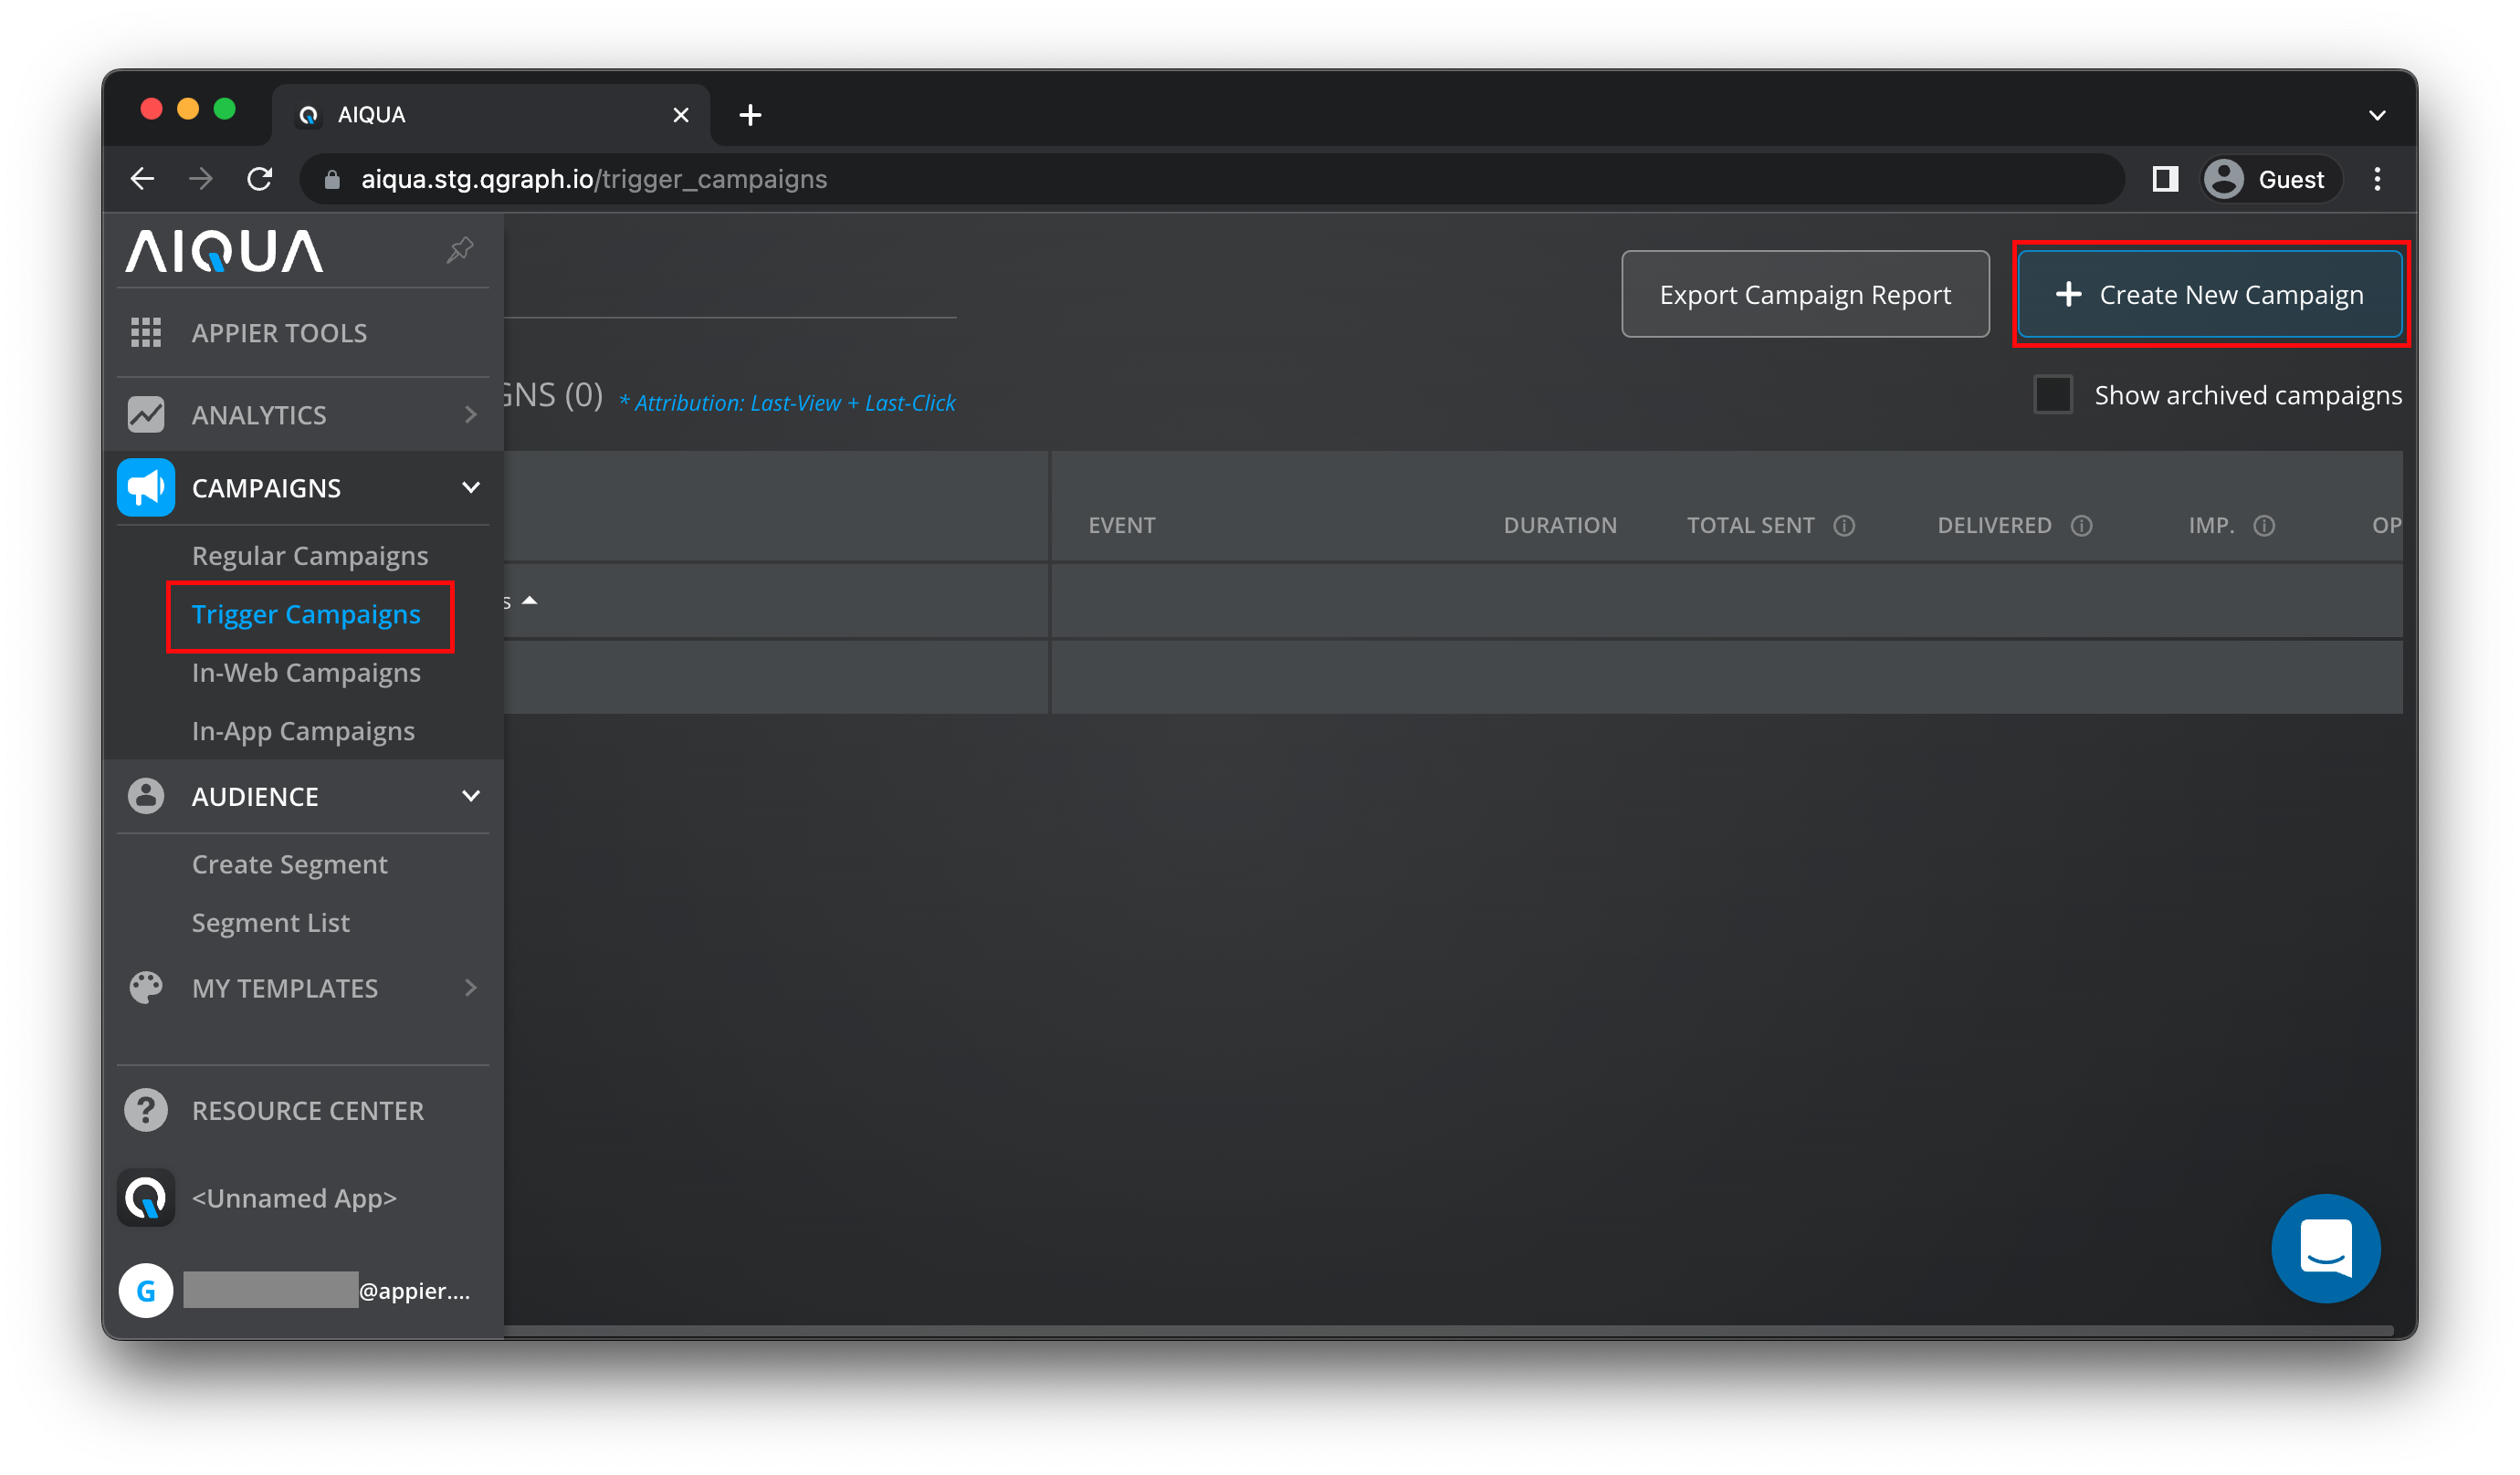
- Go to Campaigns > Trigger Campaigns, and then select Create New Campaign. Name your campaign and select Push as the Campaign type
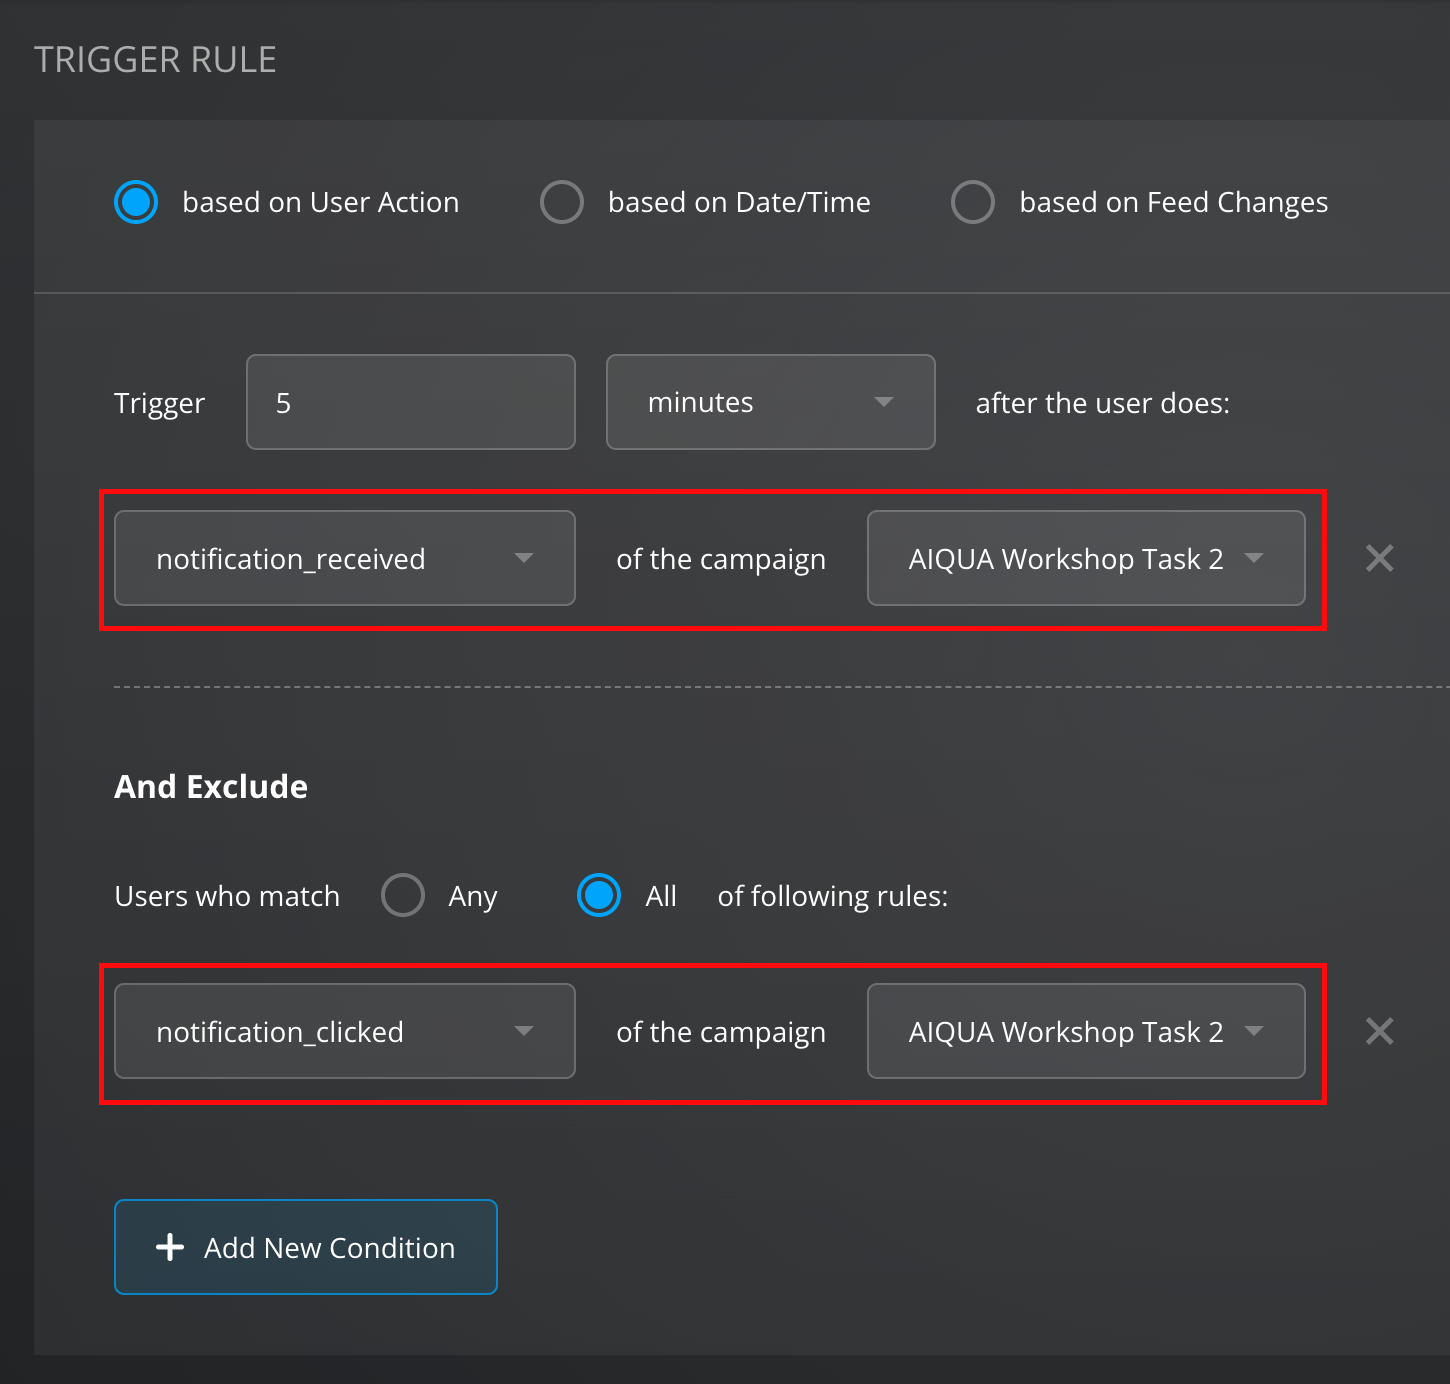
- In the trigger rules, we should condition the message to trigger based on User Action for those users who received the campaign And Exclude those users who clicked on it
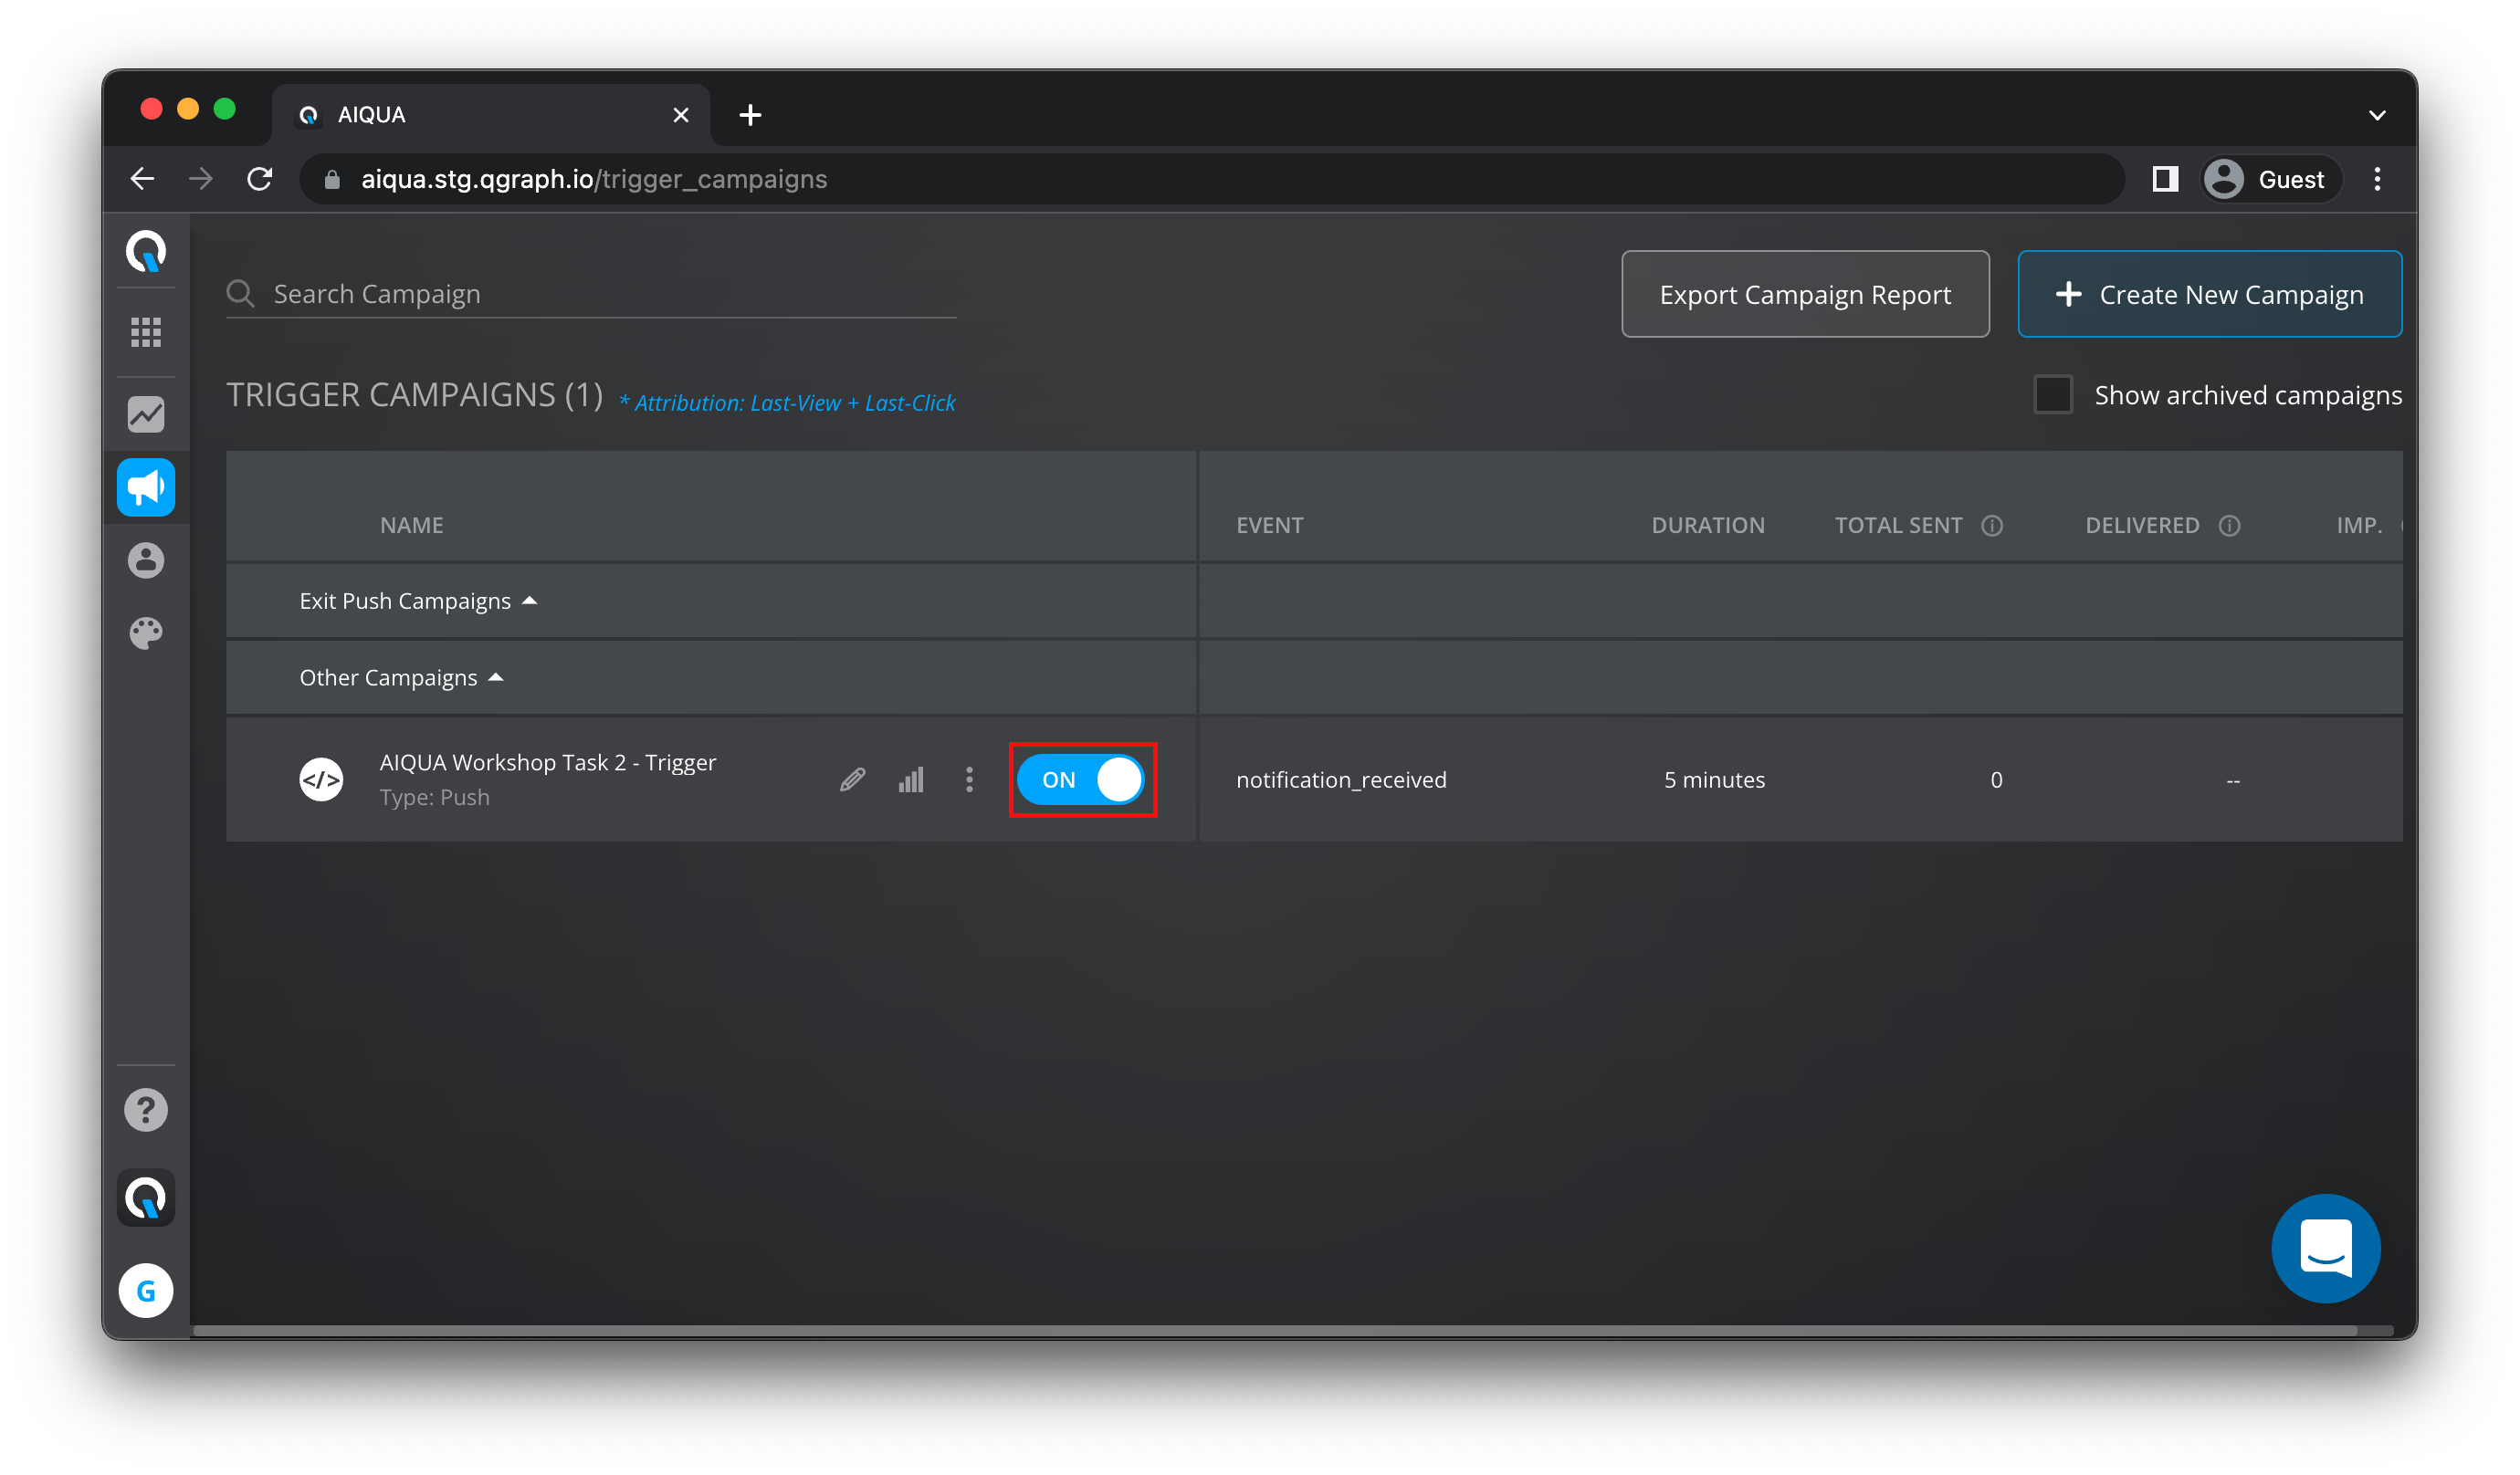
- Click save to save all your settings. On trigger campaigns flick the "ON" switch to make sure your trigger campaign is active
- Go to Regular Campaigns and manually send the second campaign (the one we duplicated for task 2). Make sure you receive the notification and remember to not click on it!. You may dismiss the notification
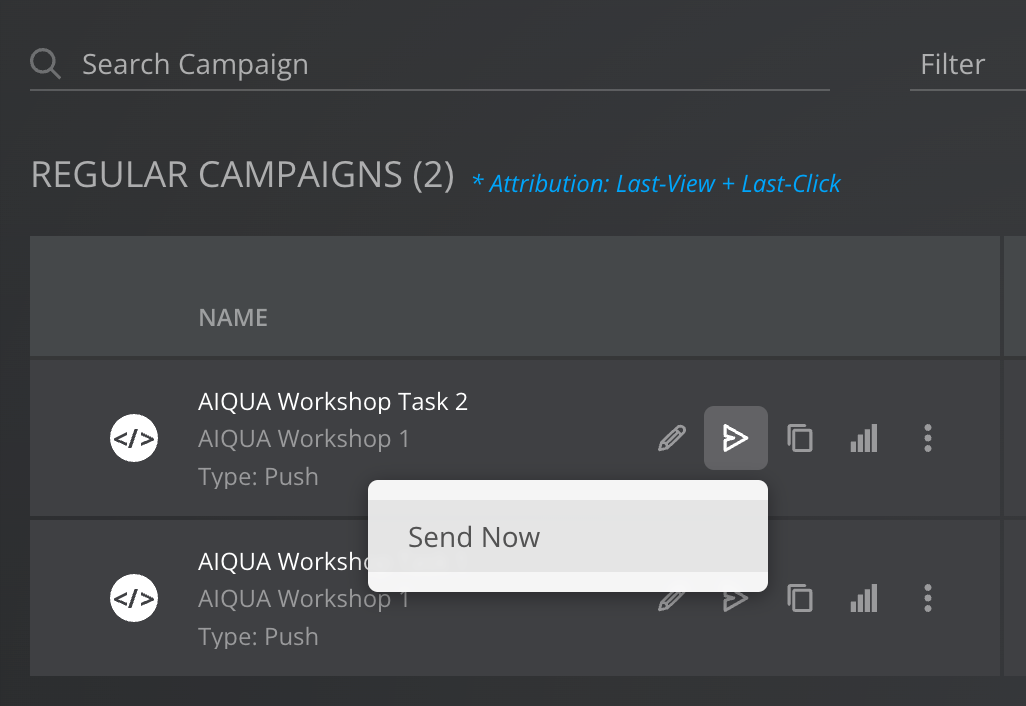
- After 5 minutes you will receive the trigger notification.
Congratulations! You have completed Task 2 and setup a campaign to trigger automatically based on user actions that will hopefully boost our online platform popularity.
The next task will teach you how to interact with the users even further.
We learned how to promote our platform's deals and promotions even further to hesitant users through trigger campaigns.
How about we reward the users that do engange with our platform? How about we send a special gift to those users who subscribe to our newsletter?
And most importantly, how do we collect the user's email?
Goals
- Create a pop-up banner to collect emails for our newsletter subscription
- Send an notification to those users to encourage them to book using our online platform
- All of the above should be achievable using AIQUA's dashboard only
Expected result
- Get a custom campaign prompting for email input as soon as the website is visited
- Trigger a second notification automatically for those users who decided to subscribe.
BONUS
- Can you display the email the user submitted in the second notification?
Give it a try!
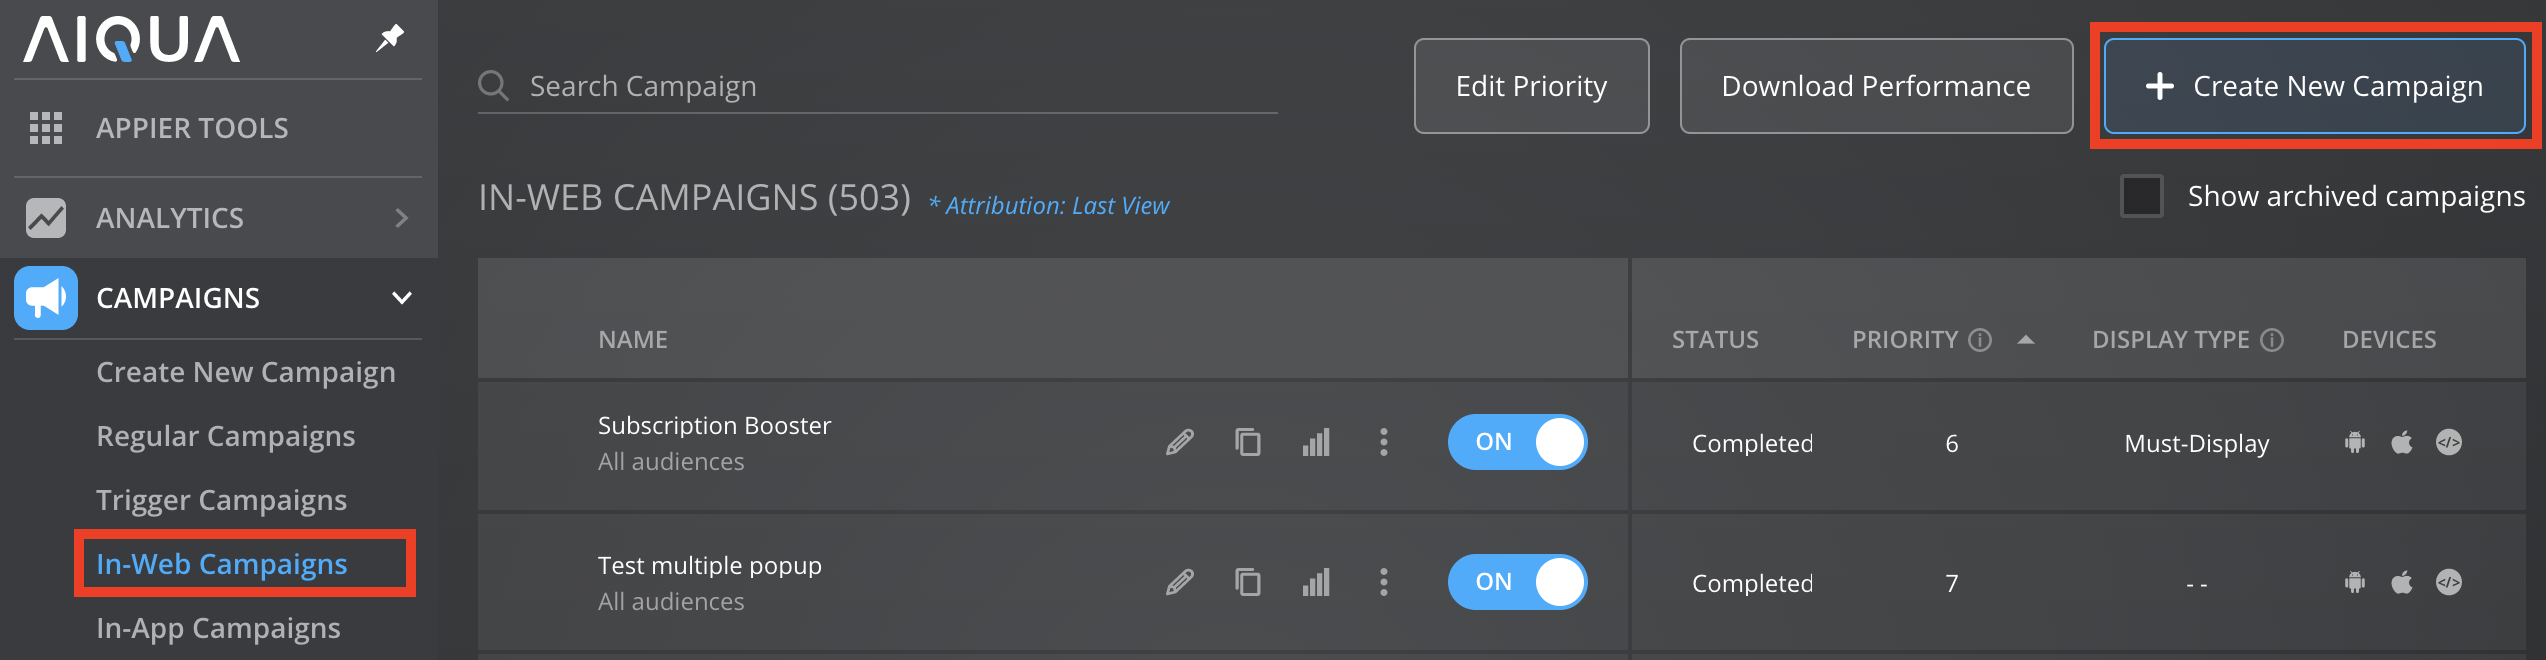
- Go to Campaigns, select In-Web Campaigns, and then click the Create New Campaign button. Give your campaign a name, we will name our campaign "AIQUA Workshop Task 3" in this example.
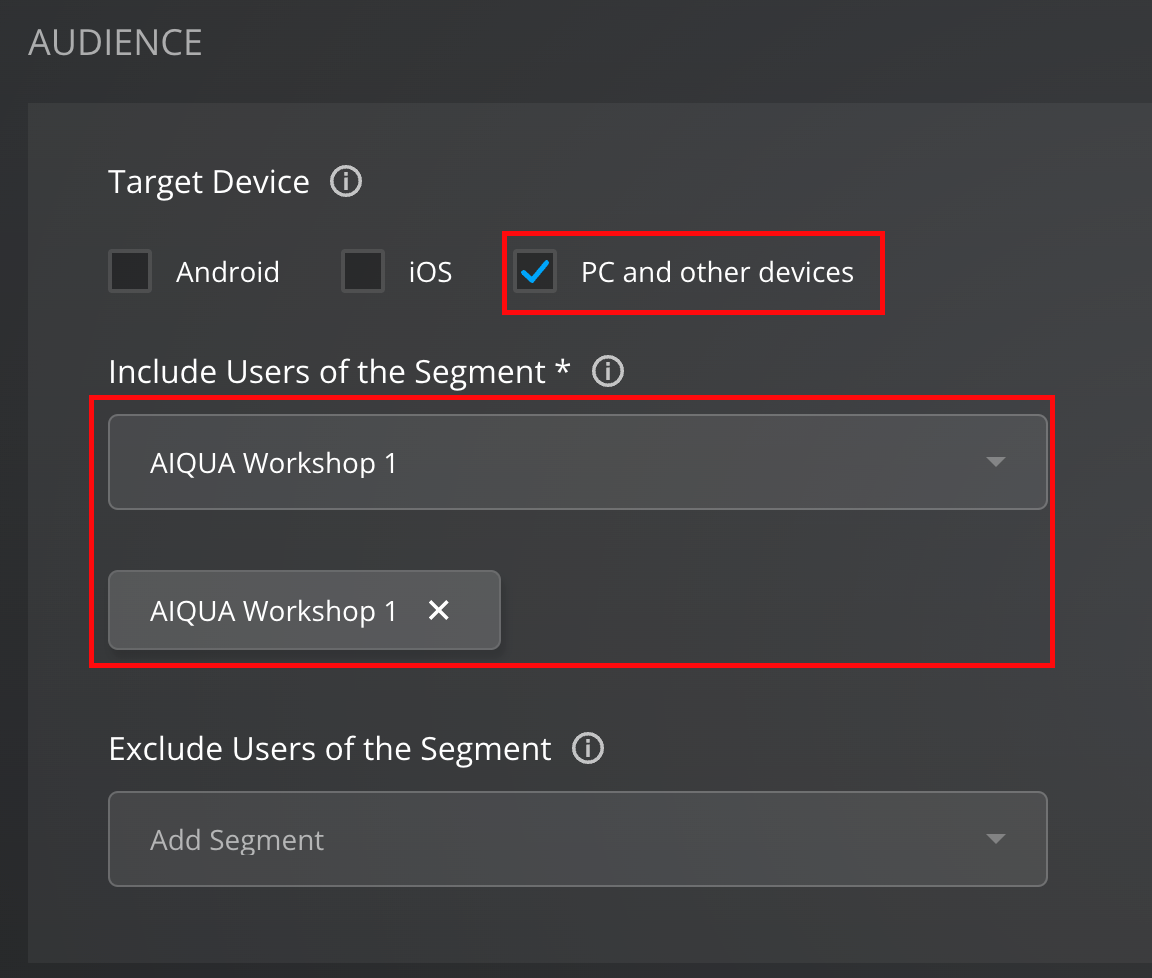
- Under Target Device choose Pc and other devices, and also select the segment we created for this Workshop.
- In Trigger rule select Based on User Action and select to trigger the notification whith the event
page_viewed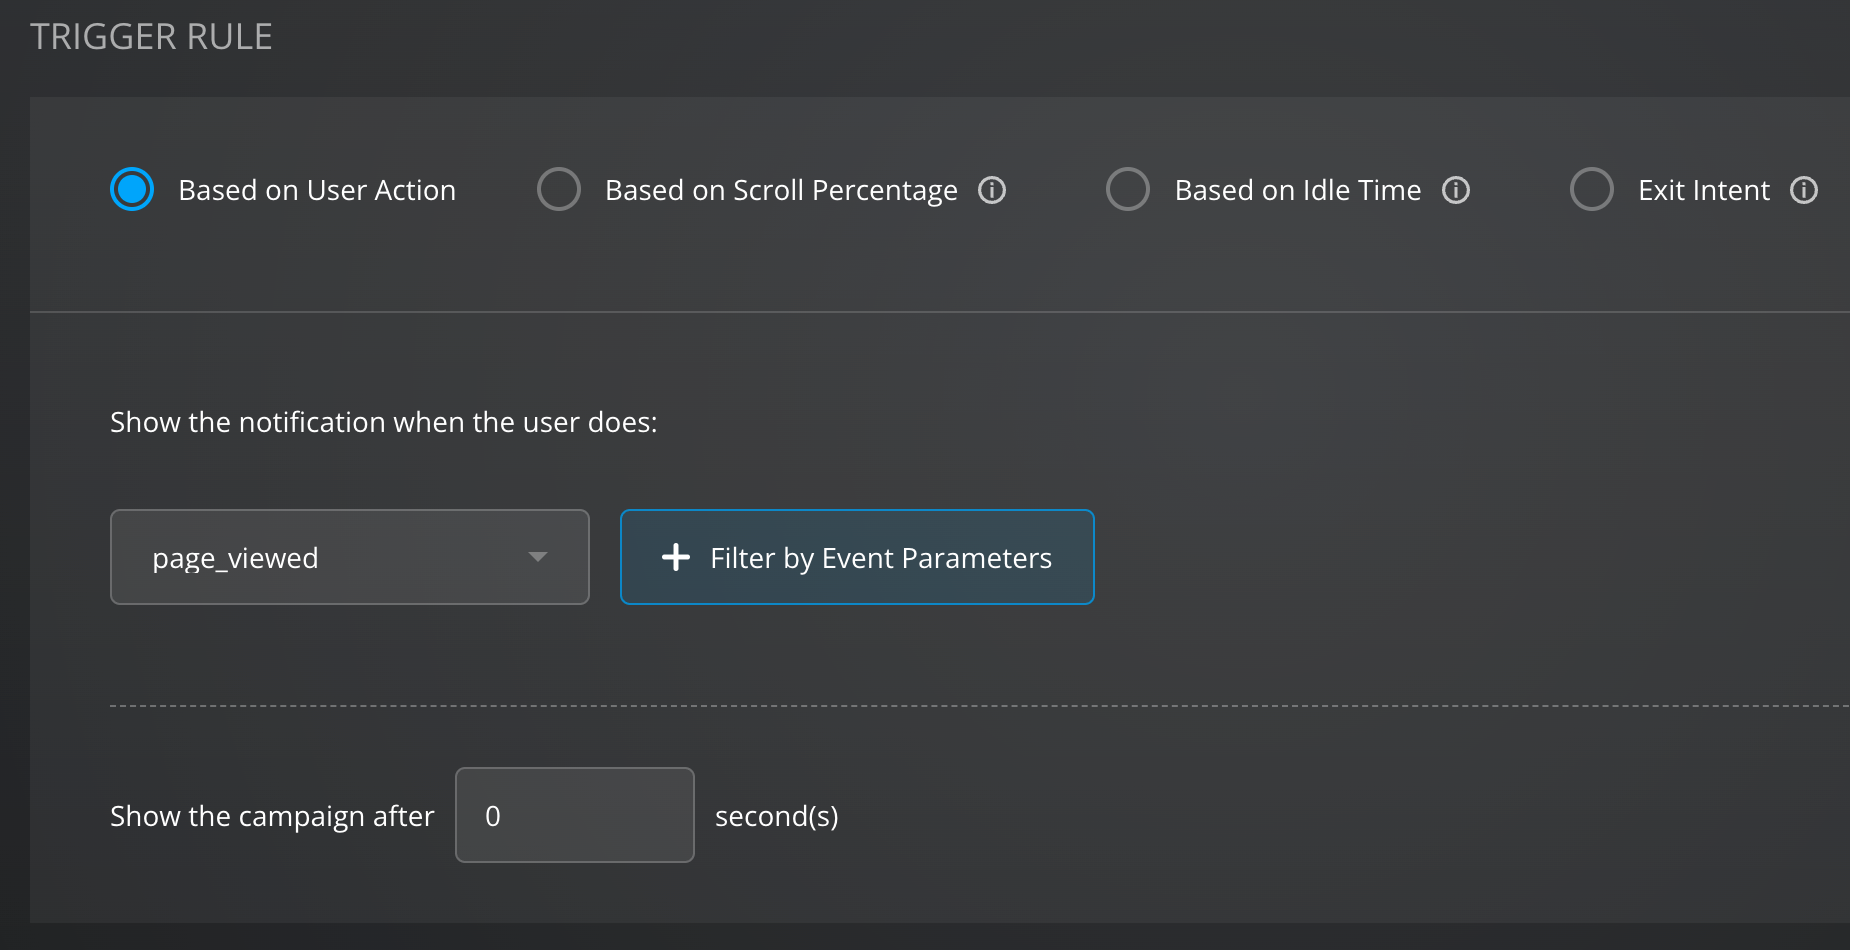
- In Campaign Delivery make sure to include a timespam that covers the current time and a couple of extra days to guarantee the campaign will be delivered.
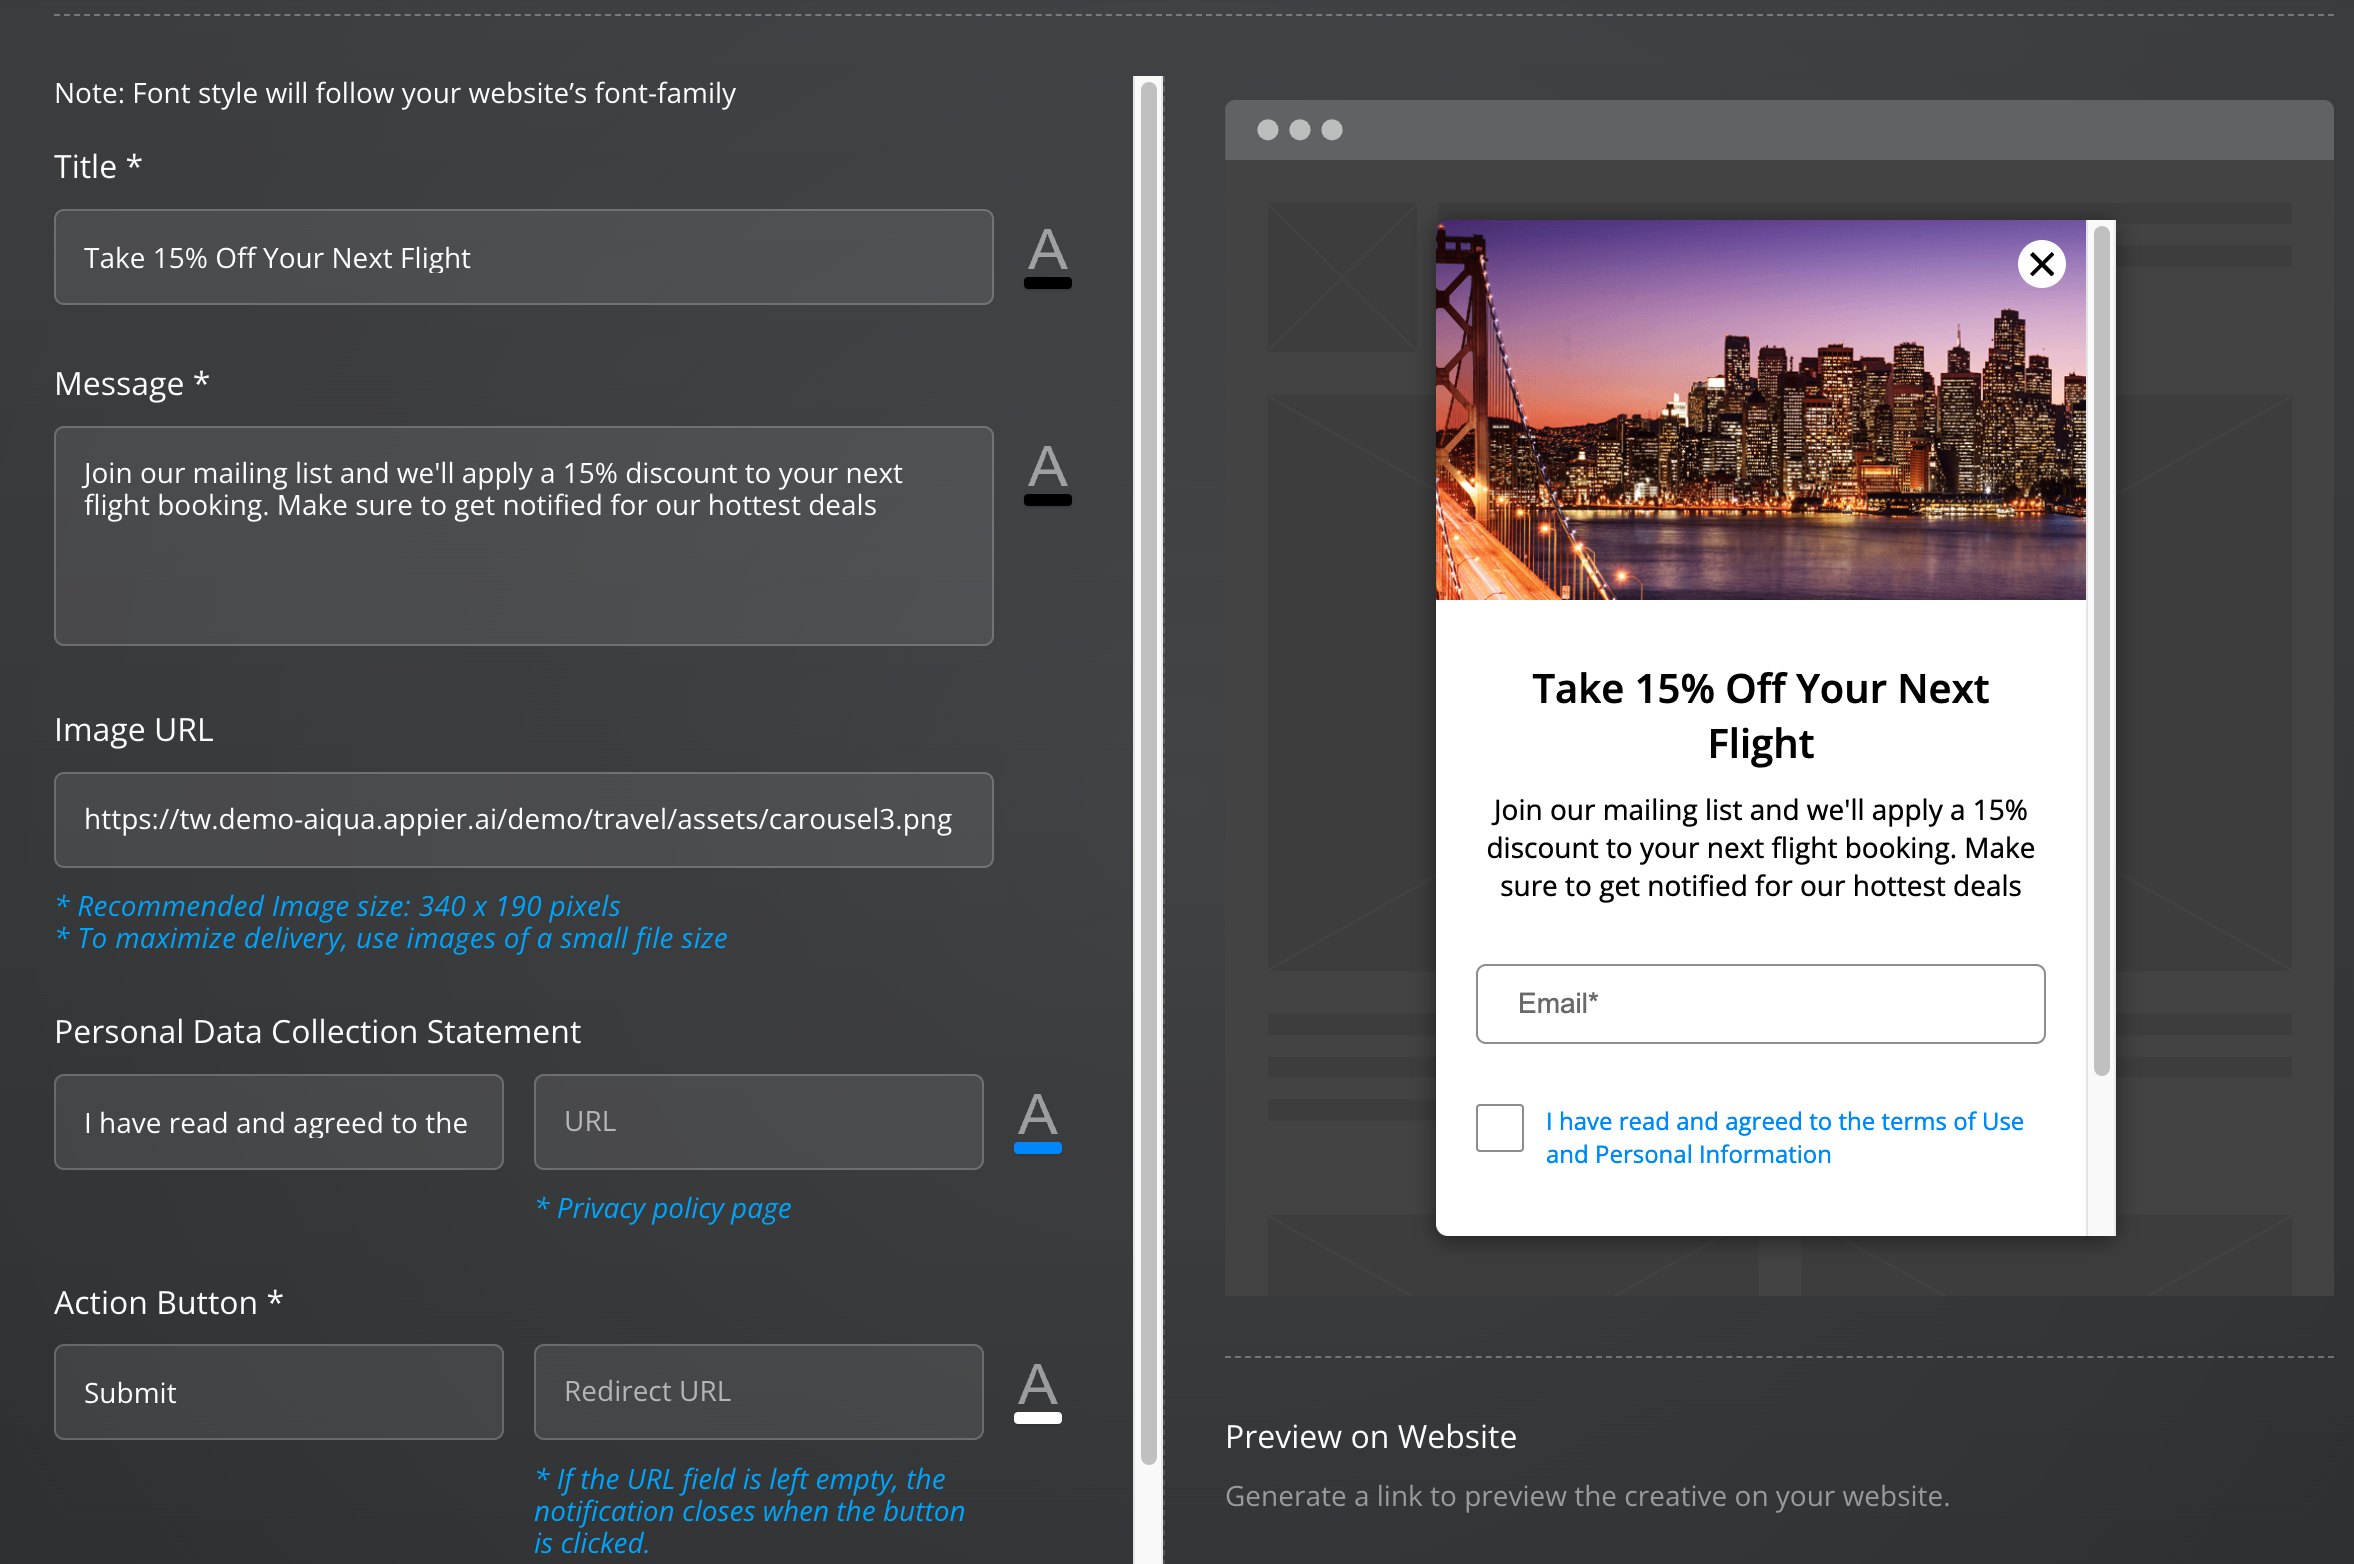
- In the Creative section, select Basic Creatives > Lead Generation to generate a pop-up with a text prompt. Fill in the required fields to design your lead generation form and make sure to request for the user's email.
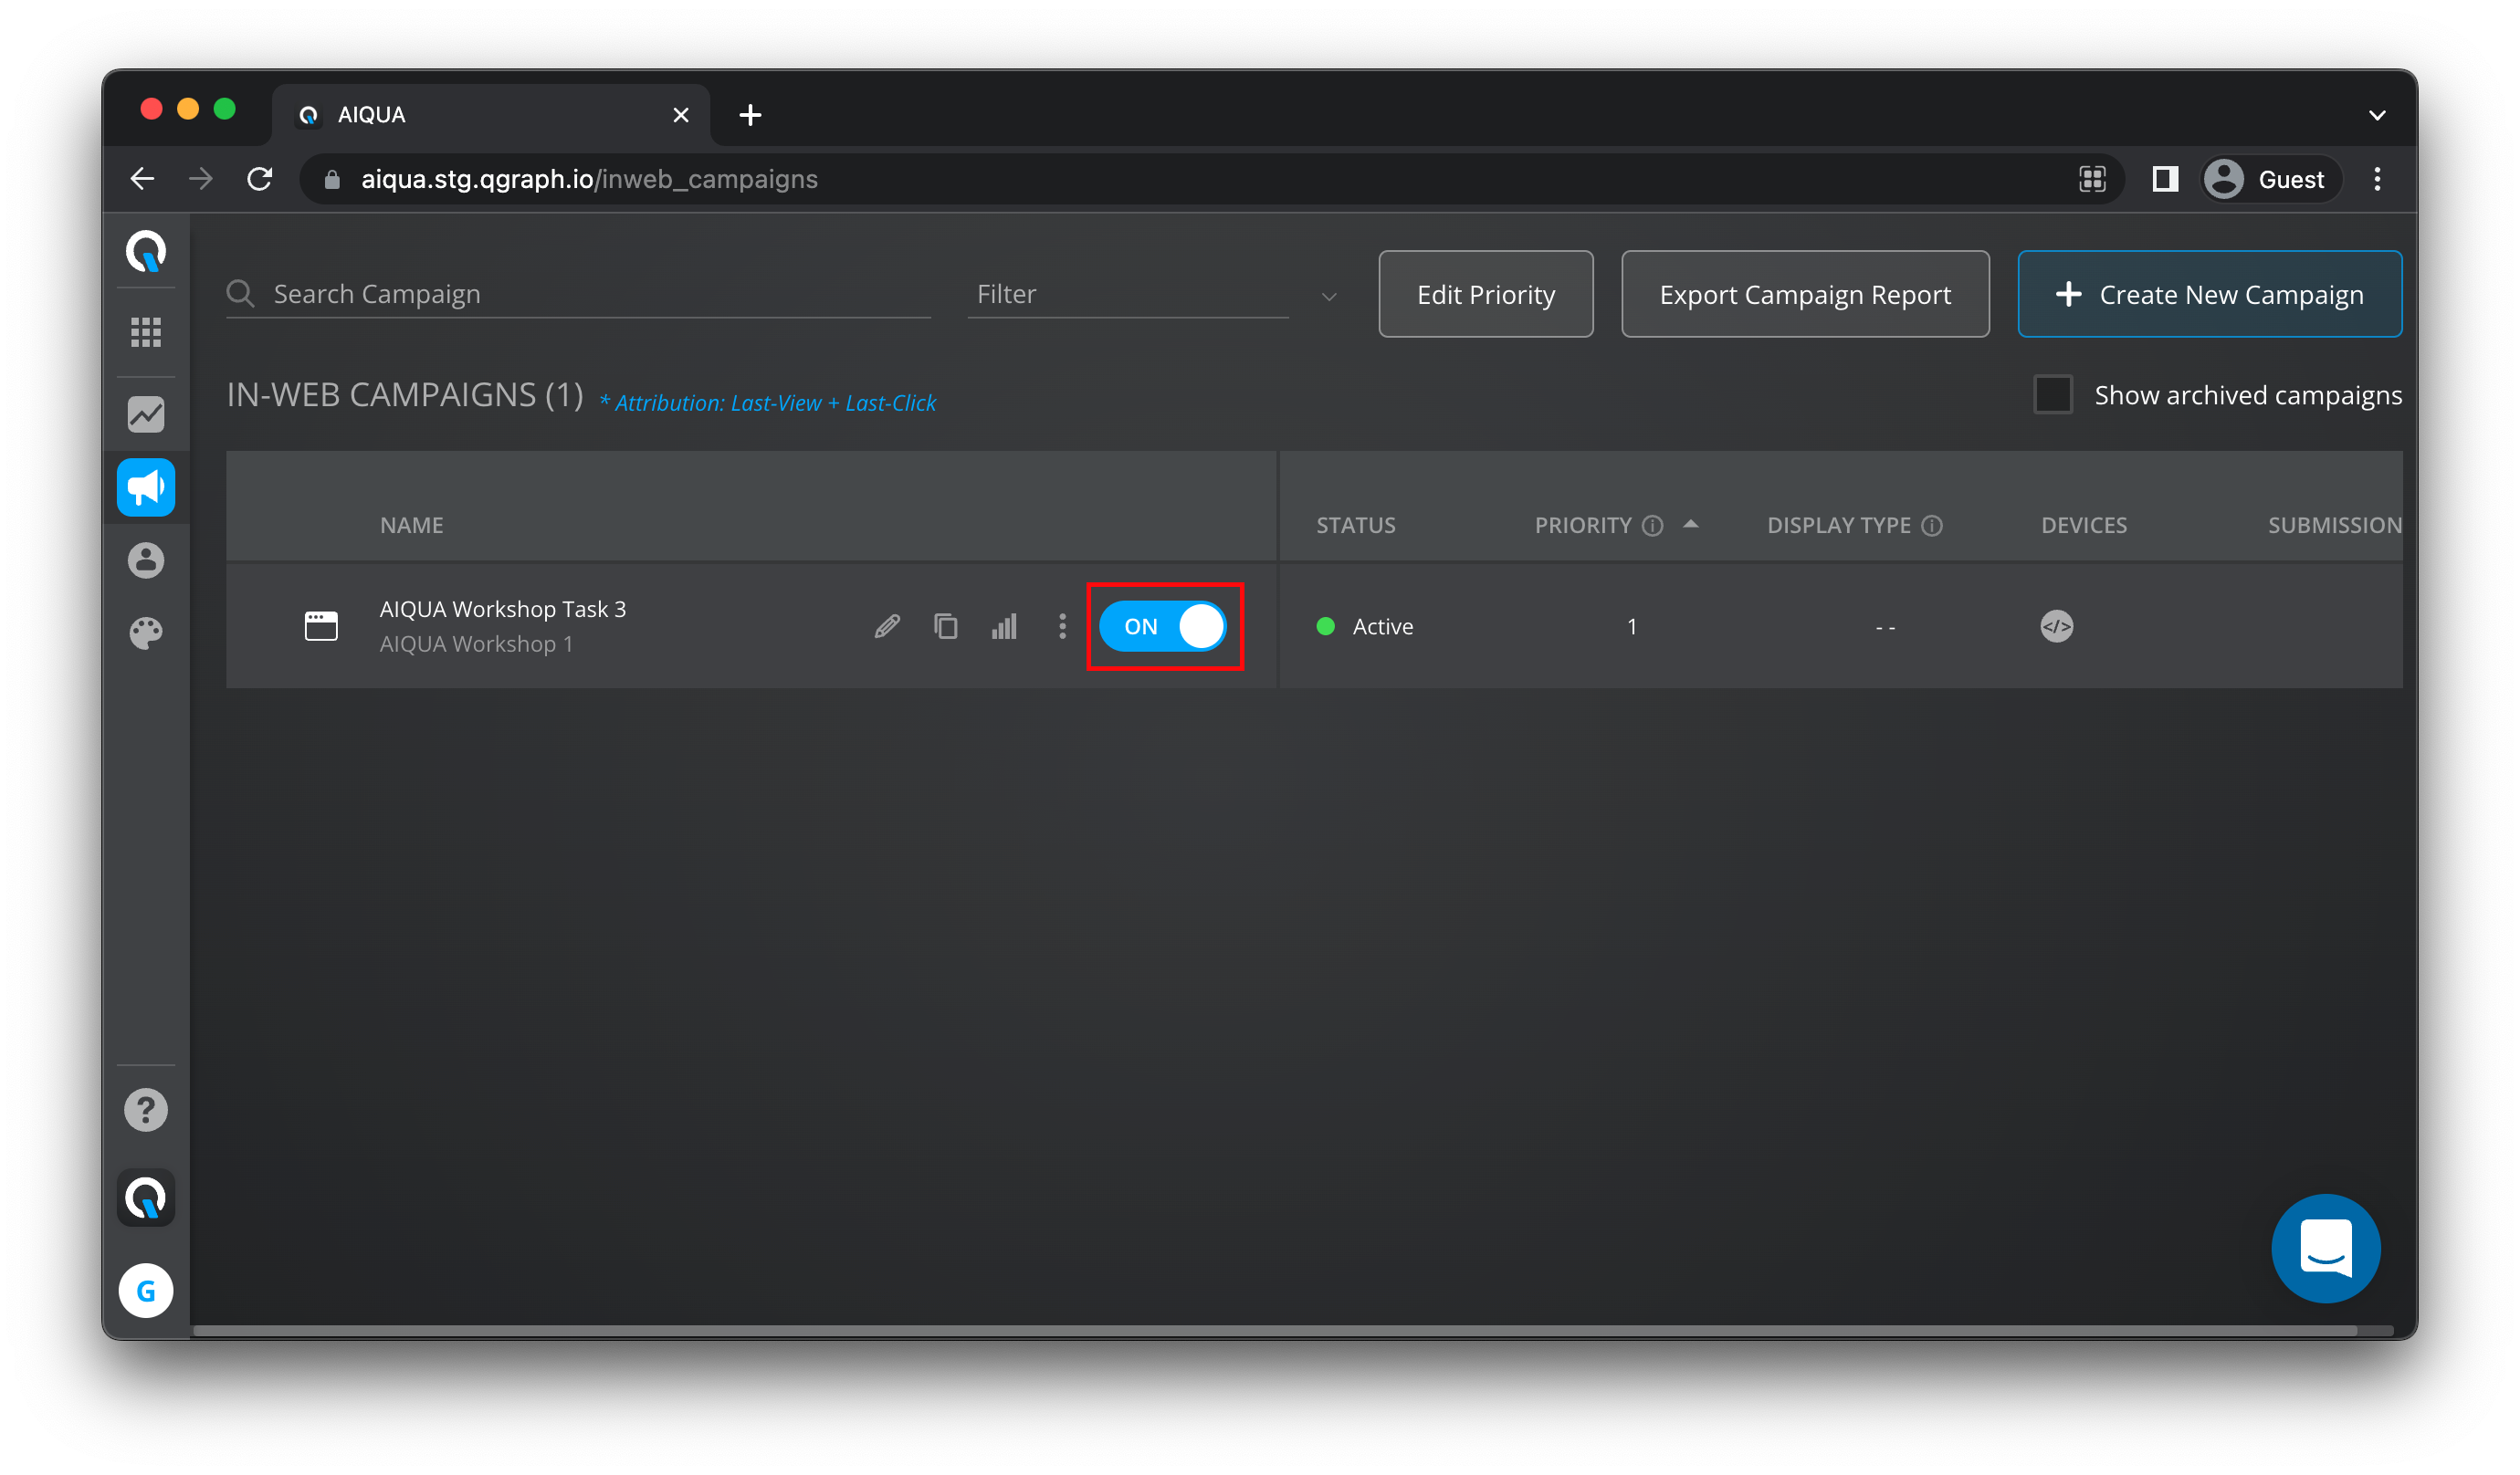
- Save your changes and make sure to activate the campaign by turning it ON
- Try reopening your website in a new tab to make sure we generate the
page_viewedevent. Your in-web campaign prompt will be displayed.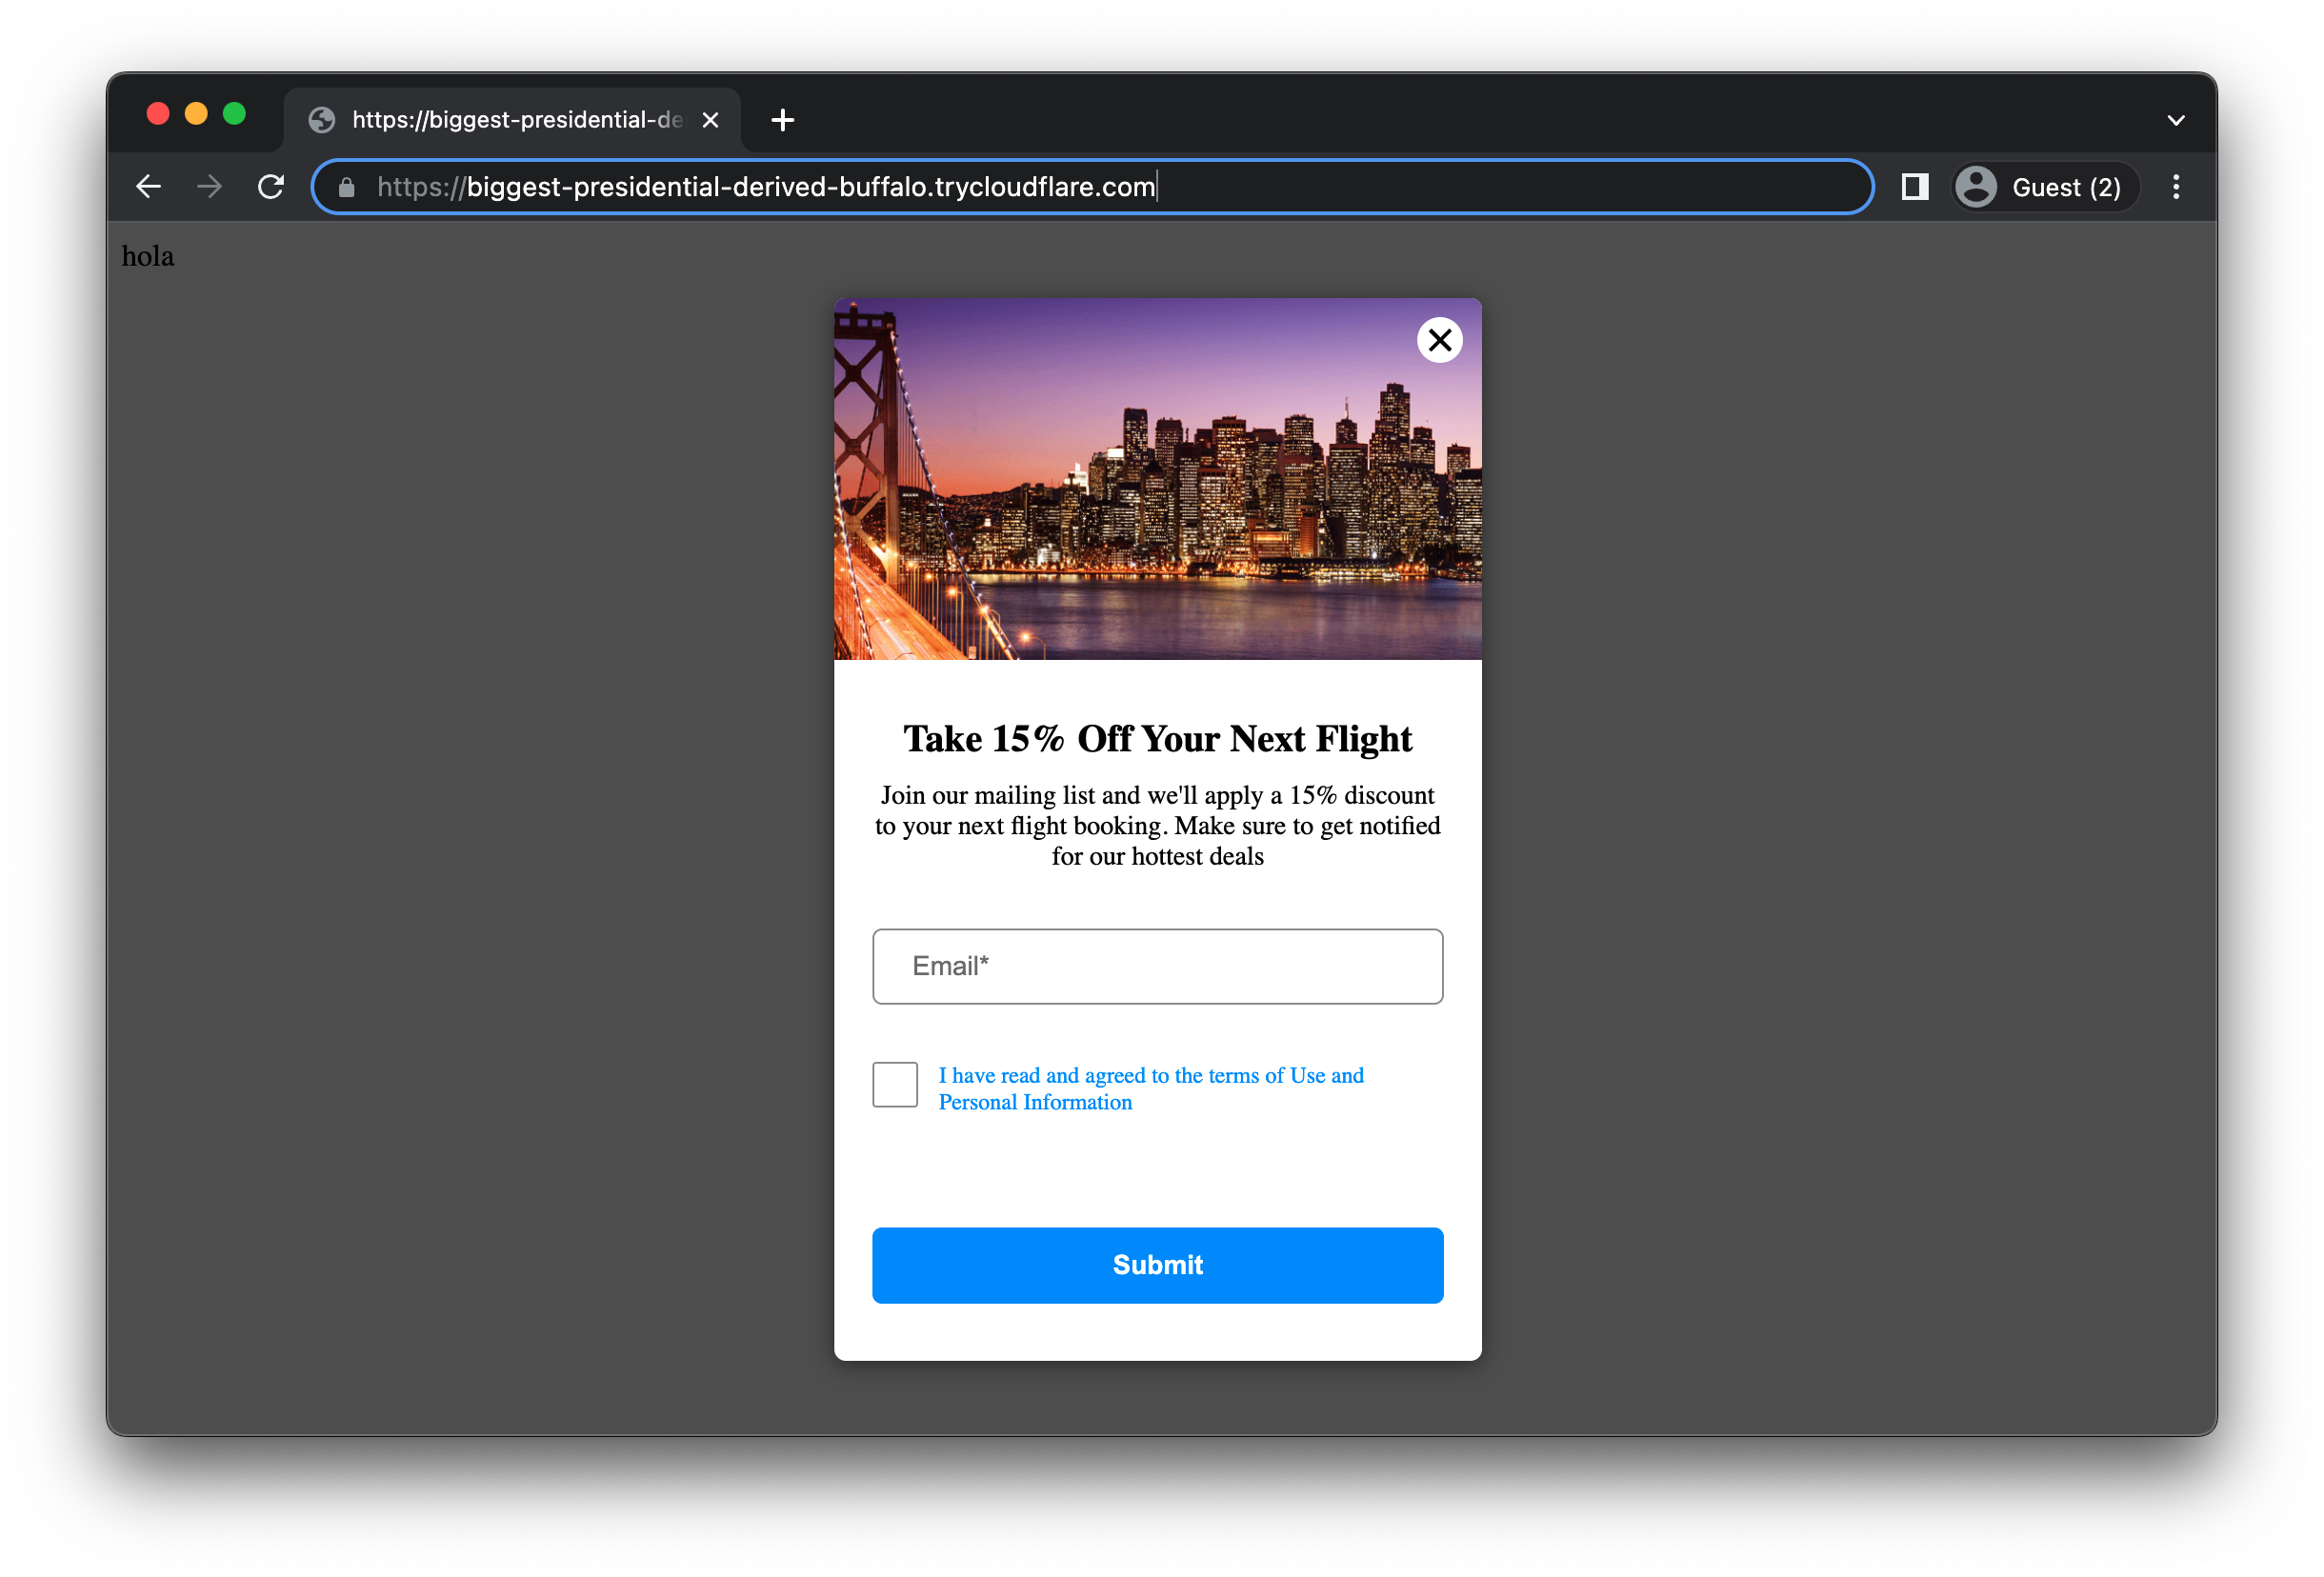
- After inputing our email and hitting submit, we head into Recent Activity where we will see an event called
qg_inweb_lead_genright afterpage_viewed. This is the event we will be triggering from.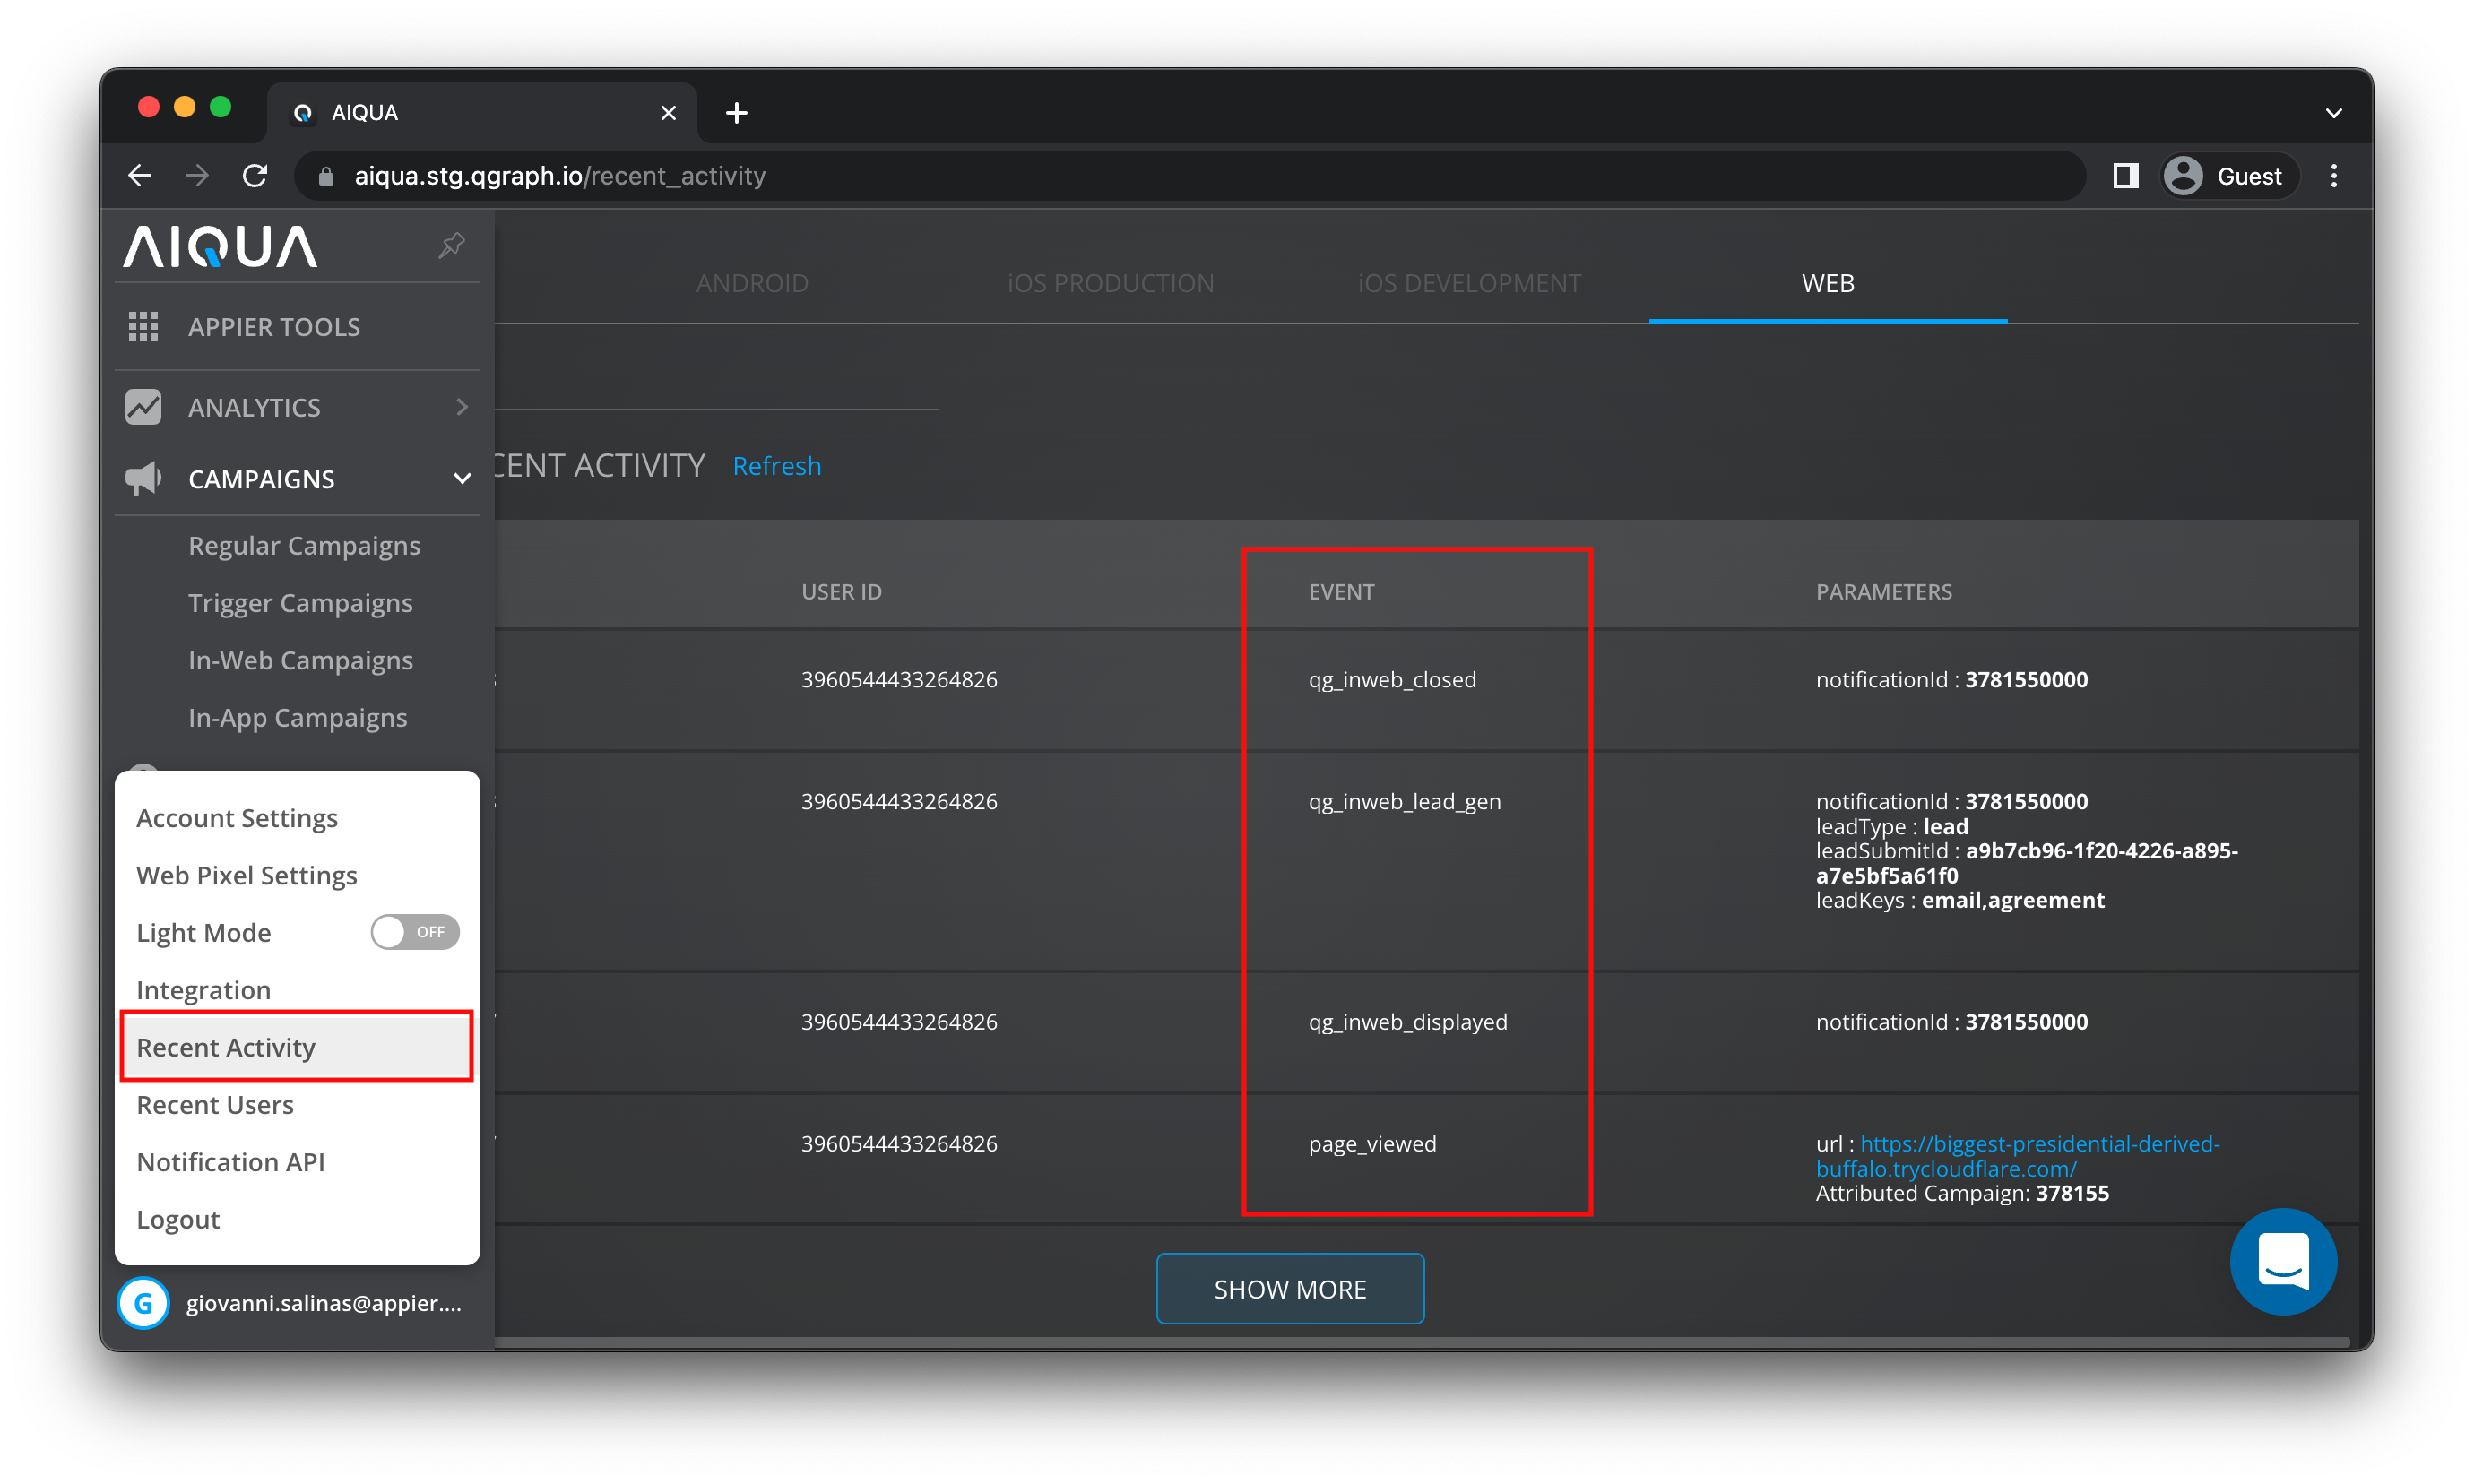
- Go to Trigger campaigns and create a new Trigger campaign just like in Task 2. This time make sure to select
qg_inweb_lead_genas the Trigger rule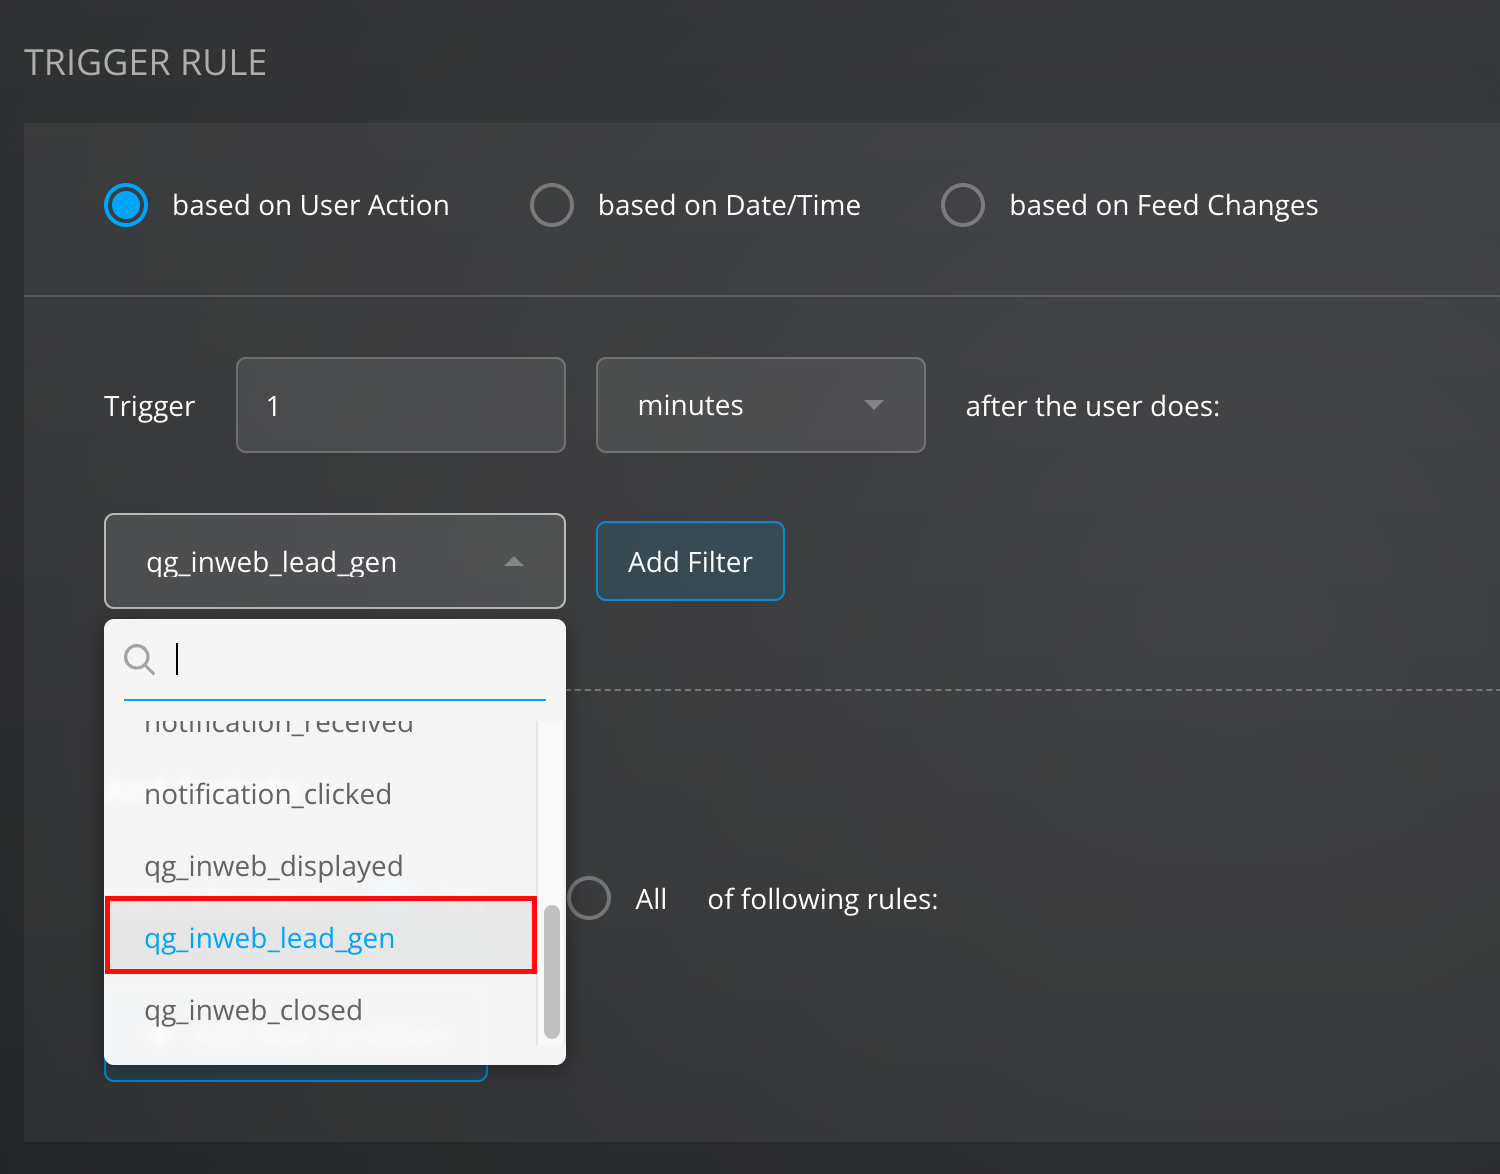
- Inside the Creative section fill in the contents of the campaign. Remember we are rewarding the users who chose to subscribe!
- Hit save and remember to activate the campaign.

- Head back to your website (by opening a new tab) to generate a
page_viewedevent, and when the in-web campaign prompt appears, input your email and hit Submit. A few moments later you will be receiving the trigger notification with your reward for subscribing!
You did it! You have finished your first AIQUA Workshop!
We guided you through the basic campaign functionalities of AIQUA and how they were applied in an online platform from the eyes of a client using real-world scenarios.
What's next
Head over the AIQUA Documentation to learn more about the other functionalities and scenarios AIQUA can provide